Sew your own Changing Pad with built-in diaper and wipes holders. A simple tutorial with lots of pictures, perfect for baby shower gifts!
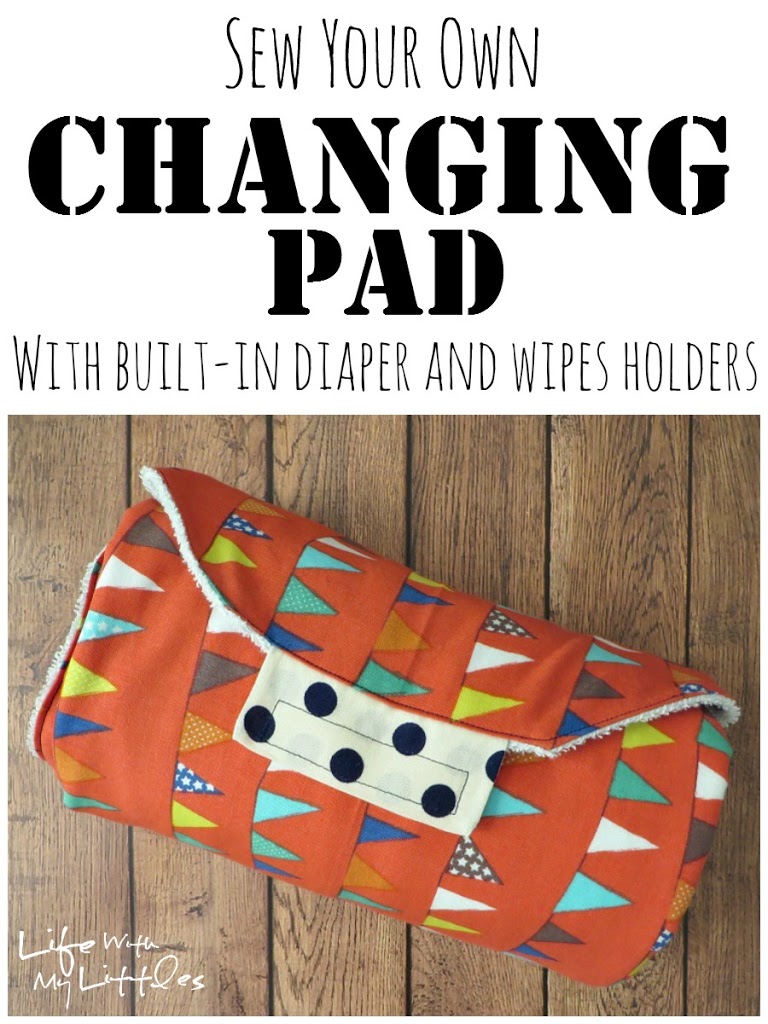
When Little J was born, my wonderful friend Shalie sewed the cutest and handiest changing pad for me. I have been using it for almost two years now, and it still is in great shape and works perfectly! A few months ago, she asked if I wanted the pattern and I immediately said yes! It has places to keep both diapers and wipes inside so you only have to grab one thing when you go change your baby, and it is soft inside so it’s comfy for baby, too. It’s not a hard pattern and I am excited that I get to share it with you today!
Here’s what you will need:
Pattern (download here)
1 1/2 yards cotton fabric (45″)
1 1/2 yards terry cloth fabric
1/4 yard coordinating cotton fabric for closure
3″ 3/4″ wide velcro
6″ 3/4″ wide elastic
Coordinating thread
Thin wipes case (mine is Huggies)
First, print, cut, and assemble your pattern.
When you are cutting it, don’t cut the extra overlaps on the right sides! Those are so you can easily match up your pattern!
Match A to A, B to B, etc. Make sure you are using those overlaps! Here’s what the general shape should look like (except this picture doesn’t use the overlaps).
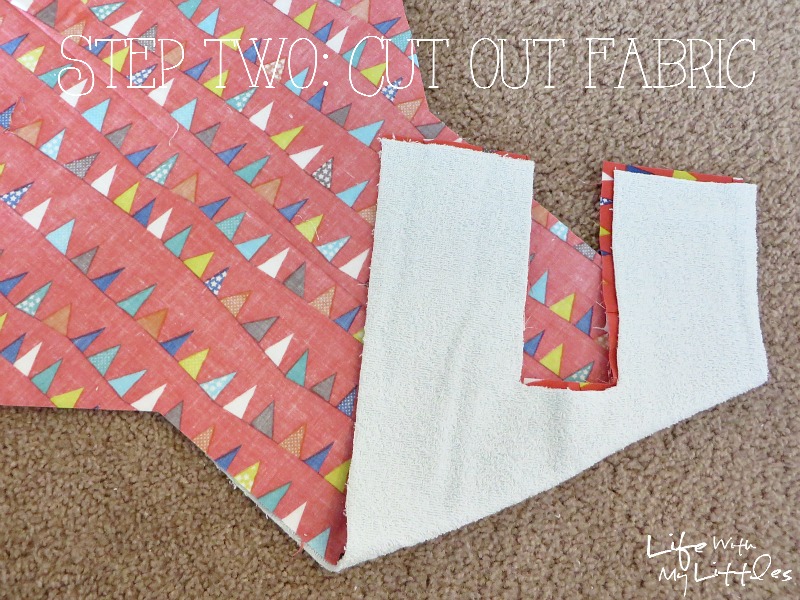
Second, cut out your fabric! Using the pattern with the edge on the fold, pin and cut it out. You will need to cut the big pattern piece on both the cotton fabric and the terry fabric. And don’t forget to cut your little rectangle for the closure (not pictured).
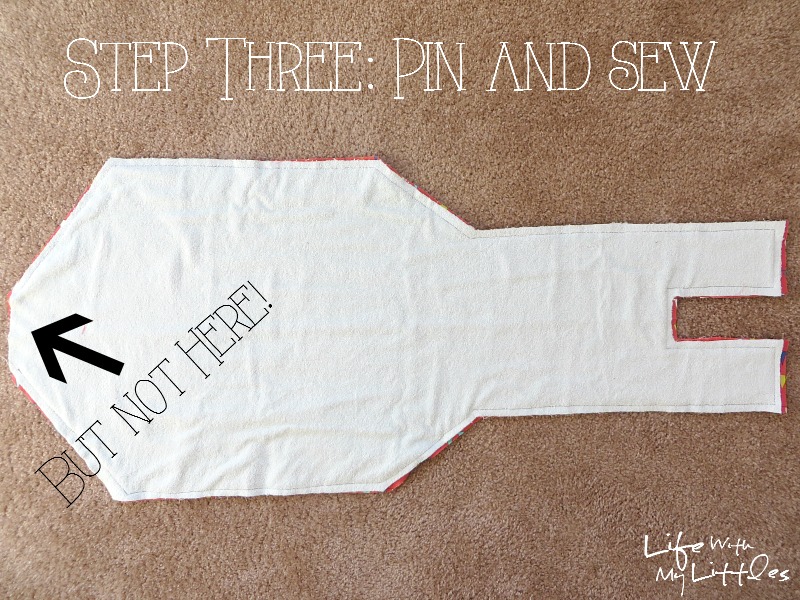
Pin right-sides together and sew all the way around, except for the very top. Sew with a 1/2″ seam for the whole thing, unless otherwise noted.
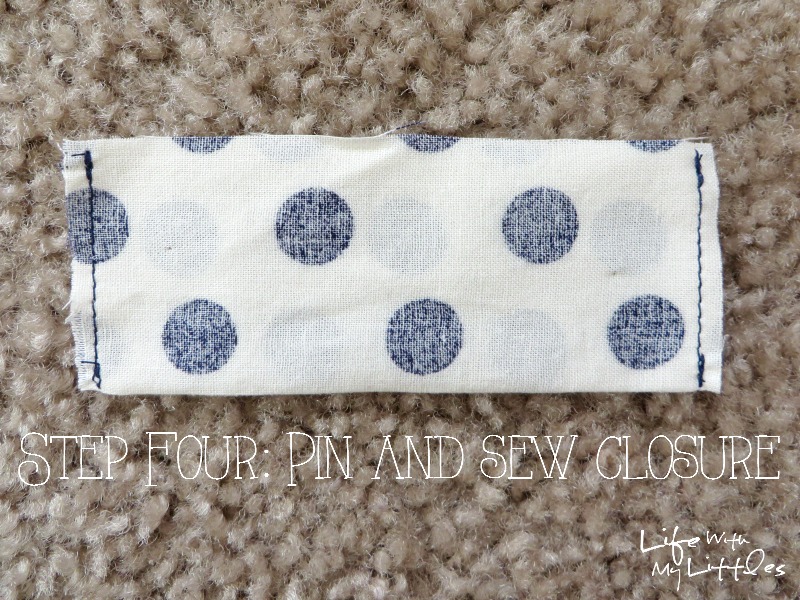
Pin your closure fabric piece, right sides together, and sew the two edges. You want to sew as close to the edges as possible on this one.
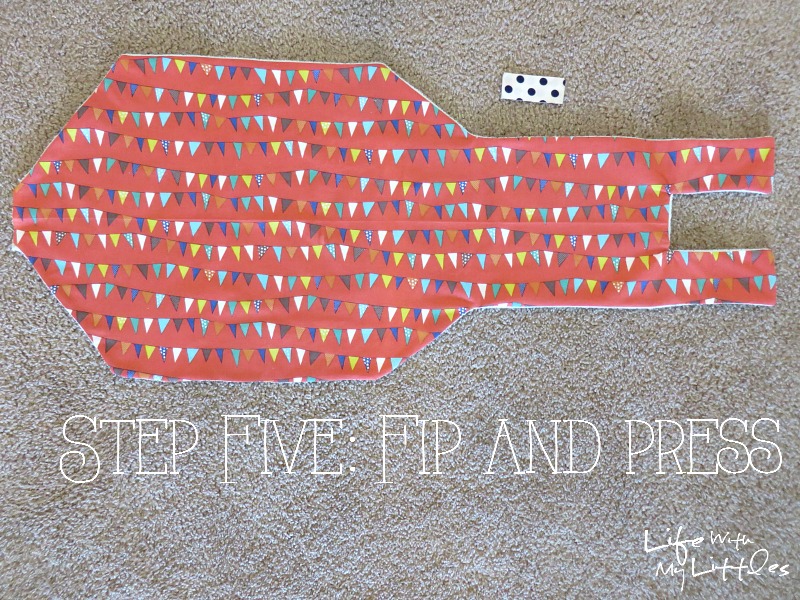
Flip both the changing pad and the closure piece inside out and press.
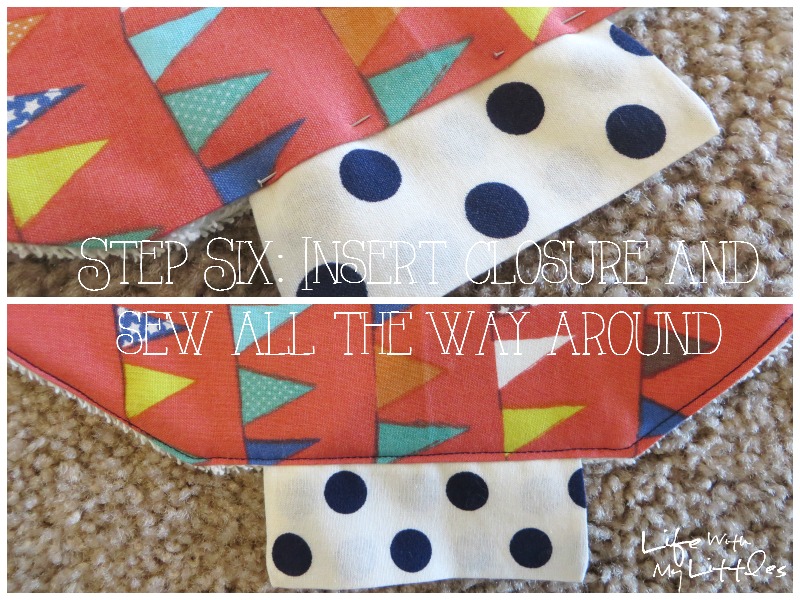
Insert the open end of the closure fabric into the open end of the main piece. Fold down the opening and sew right along the edge. Then continue sewing all the way around the edge (topstitch).
Okay this is where it gets sort of difficult to explain, so make sure you look at the pictures when you are doing this part.
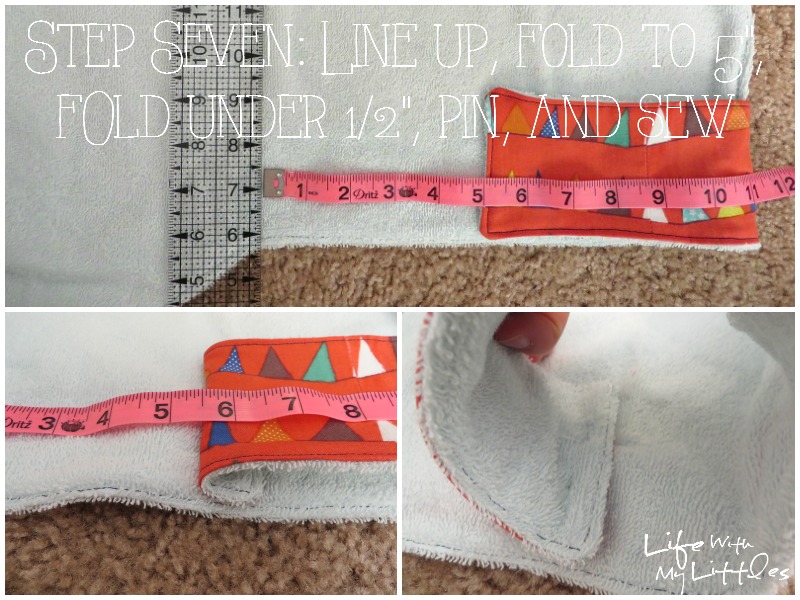
Get a ruler or straight edge, and line it up with the changing pad where it starts to slant back in (see picture). Fold over your flaps so they are 5″ away from the straight edge. Then, fold them under so they are 5 1/2″ away. Pin the folded-under part (see picture). Then sew.
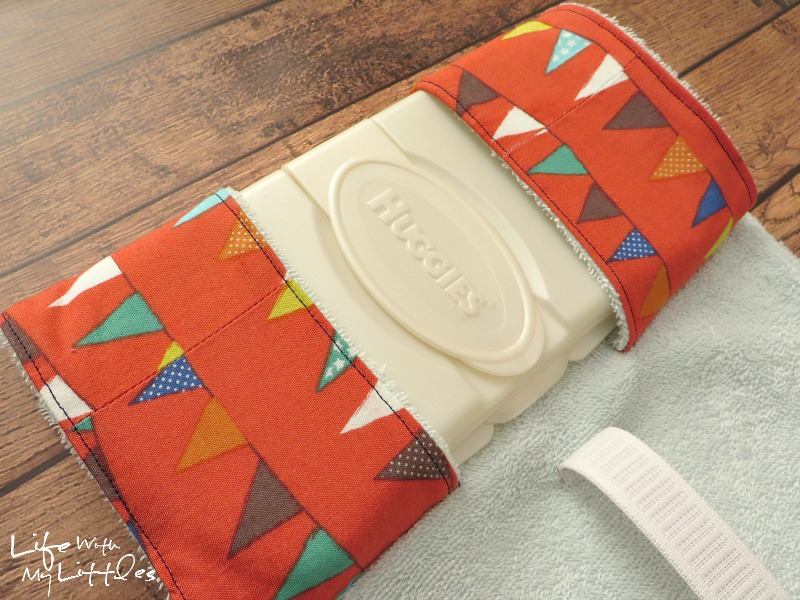
Now you have the part where your wipes case will fit!
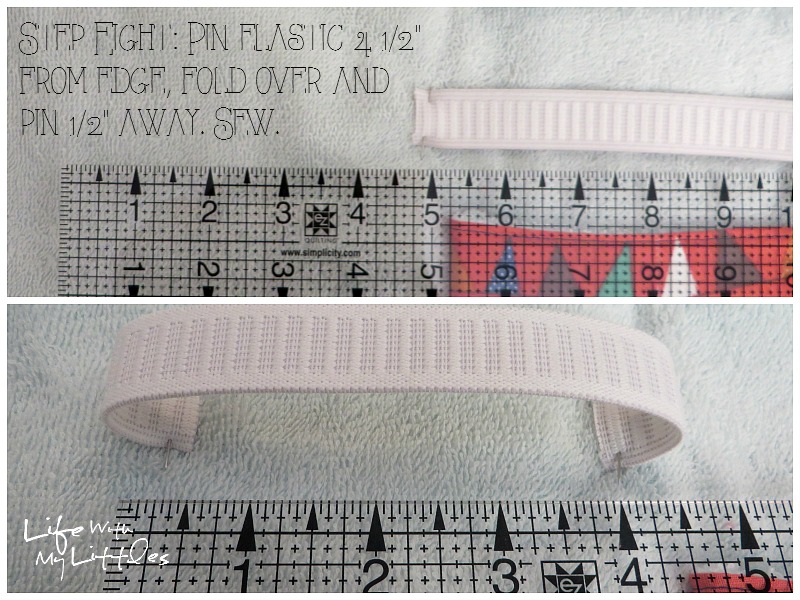
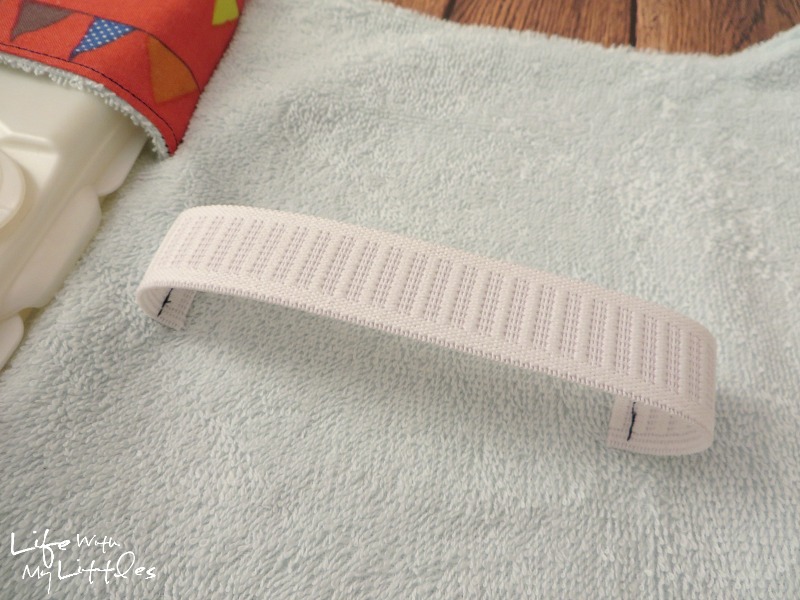
For the elastic, put one edge 4 1/2″ away from the straight edge in the center of the pad. Pin it. Now fold the elastic over itself and pin it so the ends are 3 1/2″ away from each other. Sew the folded-under parts.
Now you have the part for your diapers to slip in!
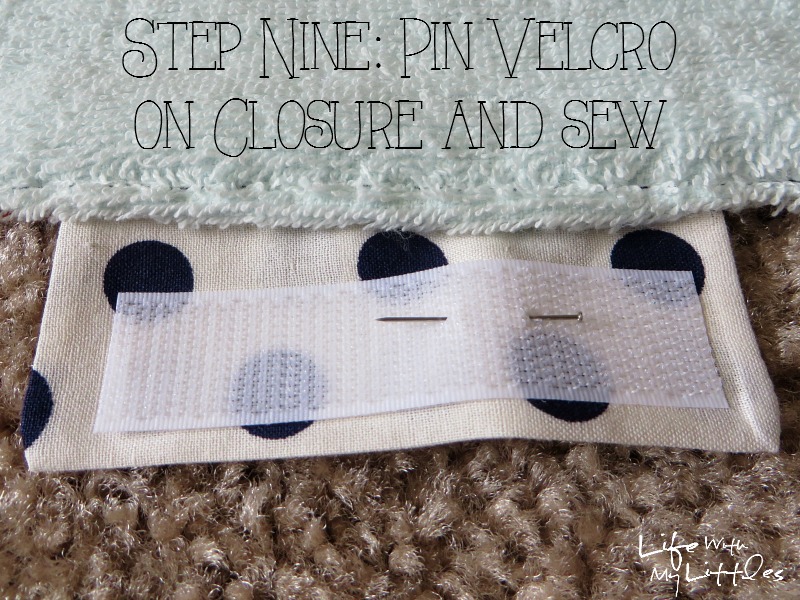
Now it’s velcro time. Sew 3″ of your velcro to the inside of the closure tab.
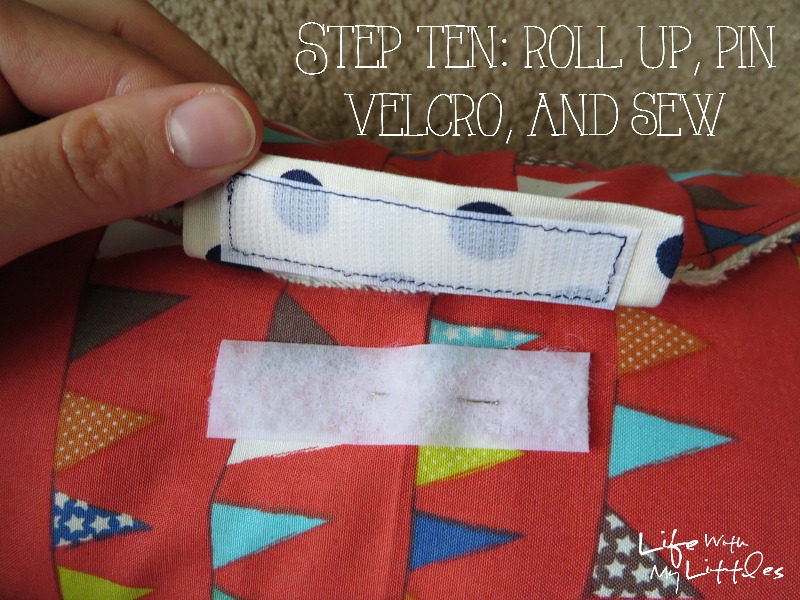
Then, roll your changing pad up with wipes case and diapers inside, and see where the other half of your velcro needs to be. Make sure you have your diapers and wipes case inside! Pin it and sew.
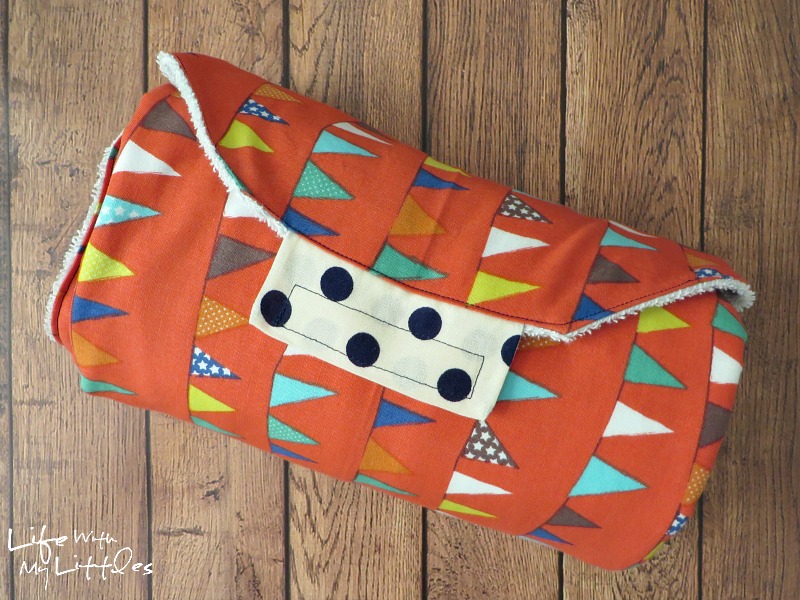
Now you are all done!
I love my changing pad so much! It’s so nice to be able to just grab one thing out of my diaper bag when I have to go change my littles.
This is a great baby shower gift, or even a great sewing project for yourself! It doesn’t take very long to make, and my materials only cost about $12, so it’s way cheaper (and more personal) than store-bought changing pad combos.
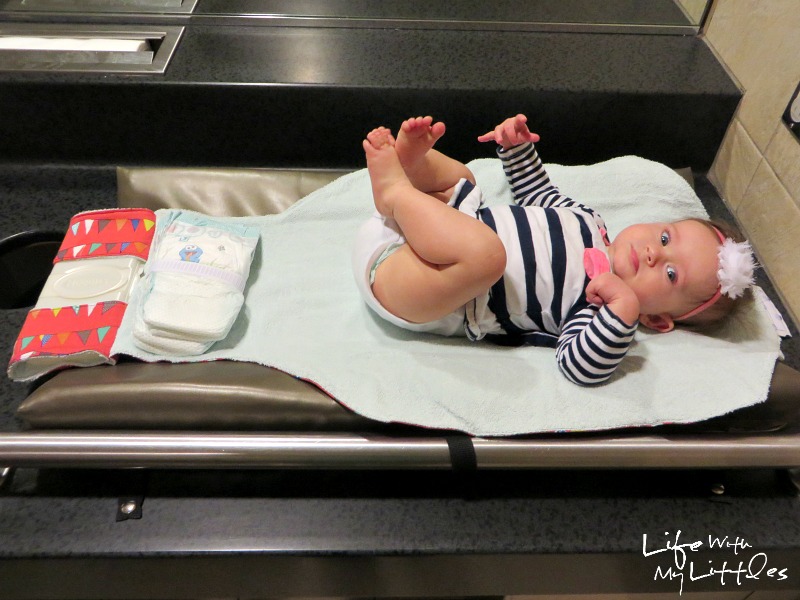
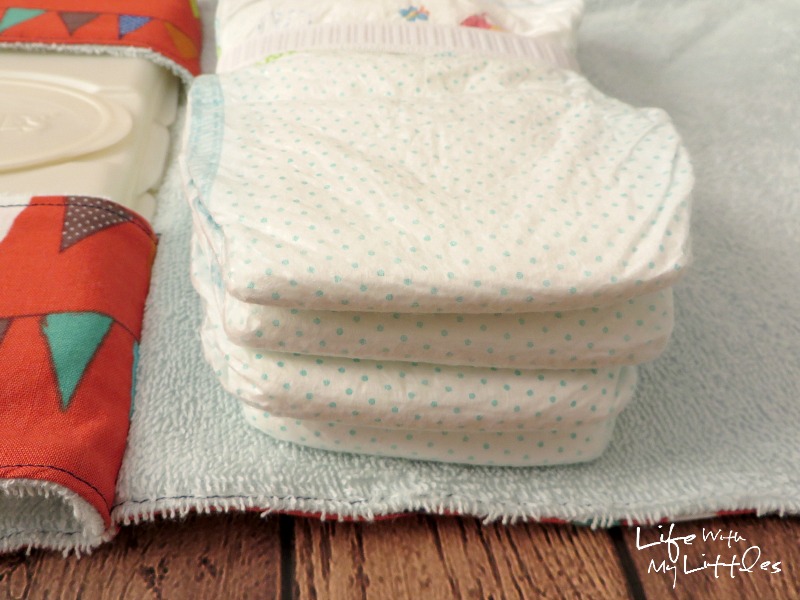
I also love that my changing pad is machine washable! And it can fit at least four diapers without stretching the elastic, so you can carry several backups!
Even Little A loves it!
Are you going to make this for yourself or a friend? Let me know in the comments below!!


Samantha says
Hi just wondering if you could give me a rough estimate of how far the velcro is placed. I’m looking to make one as a gift so I don’t have any wipes or diapers on hand.
Chelsea Johnson says
It’s about 14 1/2 inches down from the top of the carrier (not including the different fabric latch). Does that make sense? I don’t think it should matter too much, because it also sort of depends on how many diapers you put in there.
Ashley says
I am having trouble understanding cutting with the overlap. Do I cut ON the line that says A(main Piece ) or do I cut at the edge of the pattern allowing for a roughly 3/4″ allowance od fabric on the edges? Such a beautiful piece, I’d love to be able to make it.
Thanks!
Chelsea Johnson says
You don’t cut on the line. You cut at the edge and then line up each piece with the line that says A(main piece) (or whatever the line is). Does that make sense?
Alyssa says
I’m making two of these tomorrow; one for myself (my second baby is due February 4th- so a little over 2 weeks from now!) and one for a friend who is due in April. I spent some time this evening putting together the pattern, using it to cut my fabric pieces and then pinning everything right sides together so that I can just throw them on the machine tomorrow. I greatly appreciate the simplicity of this tutorial as well as the many pictures! Thanks a million!
Chelsea Johnson says
That’s so exciting! I’m glad you were able to figure it all out and get everything set! I hope sewing goes well tomorrow!!
Elise Mottley says
I made this change mat. It’s great! But keep in mind that you can no longer get the huggies container that is shown. An adjustment to that part of the change mat might help fit other types of wipe better, and will make the access to the opening easier.
Chelsea Johnson says
I actually don’t use my Huggies container anymore. I just put my wipes pack from the store directly into the changing pad and it fits fine!
JulieMc says
Thank you for the great tutorials. You do a fantastic job of writing instructions simple enough that newbies can understand them. I’m experienced in sewing, but some of the patterns/instructions certain blogs share are written
in some sort of legal/latin-eze that I don’t they understood when it was typed. (**sigh**, giggle) I’ll be making these for gifts…. both for new moms and friends that are new grands. What “smart” Grand, Aunt or Bestie wouldn’t want one of these in their car for that crazy last minute when they end up with the newest angel? Sounds like you have a terrific friend in Shalie – thank you both for sharing!
Chelsea Johnson says
Thanks for the comment, Julie! I hope they turn out for you! I’m not good with complicated instructions so I try to make them as simple as possible!
charlene says
Did I miss it, but what are the dimensions of the main pieces? I seen the pattern but there were no numbers. What is the overall length of the pad?
Chelsea Johnson says
I actually don’t have those dimensions.
charlene says
That is OK, I figured it out thanks. I am making for grandchild, I like the idea of kam snaps on edge of wipes section.
Chelsea Johnson says
Great!!
Chelsea says
What are the dimensions of the roll? I don’t have a baby but am interested in making one of these as a gift for a friend having twins. I want to make sure the size is practical to fit into her diaper bag with all of the other things she’d need to carry in there.
Either way, it’s super cute!
Chelsea Johnson says
It should fit into any diaper bag. It’s about 10 inches long and 14″ all the way around. It fits great in my diaper bag with all of the baby and toddler stuff I’ve always had to carry. Thanks, Chelsea!
Sharon Fields says
Just finished one for a great grand baby that’s arriving any day. Wish I’d have known about this when I had my baby many many hrs ago! It’s so handy to have everything all in one place. I folded the side in when rolling it up so it fits better in a diaper bag. I think that’s what your supposed to do? Great idea, easy pattern. Thanks so much for sharing this. It will now be on my list of things to make for baby showers!
Chelsea Johnson says
Yes, you are supposed to roll up the sides 🙂 I’m so glad you like it! Congratulations on your great grandbaby, and I hope the changing pad comes in handy!!
Julia Mayhugh says
I was just wondering…how does one know what size to print this at? Should I just print the PDF to regular Letter-sized paper and then combine the pattern pieces from there?
Thanks for this tutorial! I’m expecting my first and planning on making it this weekend.
Chelsea Johnson says
Yes, just print it at 100% on letter paper and combine the pieces! Good luck and congratulations!
Laura says
We’re sewing one for my baby who will be here any day! We were wondering how you sewed down the flaps that hold the wipes in. This is super cute! Thanks for sharing!!
Chelsea Johnson says
I sewed them on the inside. I had to flip it inside out a little to sew them. You can look at the pictures and see how it’s supposed to look. But flipping them a little bit after pinning will help a lot. I hope that makes sense! And congrats!
Daniella says
I am not coming out correctly! When you say cut out the pieces I cut where the lines were so that where it points to cut on fold is right along the lines. I sewed the whole thing together but it is too nearly. The wipes box it sticking out. Are we not supposed to cut the pattern side line ?
Chelsea Johnson says
You are supposed to fold the fabric in half, and then the fold is supposed to match up. You aren’t supposed to have two pieces to sew together. Is that what you did?
parmeet says
Hi This looks super cute, I am a first time mom my own concern is, does the changing pad need to have vinyl in it or
no not really? Am really looking forward to making this but not sure if i should add vinyl or no.
Chelsea Johnson says
I haven’t used vinyl in mine and it’s fine. It’s machine washable so it doesn’t make a difference if it has vinyl or not!
Brenda Chiew says
Hello Chelsea,
Thank you for your wonderful tutorial. I am a beginner in sewing and I would love to sew this for my sister in law and a dear friend as baby shower gifts. One part that I can’t really understand is at step seven. How did u sew the part for the baby wipes without sewing from the top part/main fabric? I hope you don’t mind to show me or explain how to position it at the sewing machine. Thank you so much for your help.
Chelsea Johnson says
You’re welcome, Brenda! I’m glad I could help! Mine is sewn to the top part. If you had wanted to do sew it without it showing just to the terry part you would’ve had to sew it before sewing the two main pieces together. I really don’t think it’s a big deal to have that showing through on the top, especially if you use a thread that matches! I hope that helps!
Brenda Chiew says
Thanks Chelsea for your reply. I meant I don’t see the stitches on top of the folded part. On the sides, yes I can see that you sewn on top. Thanks again.
Chelsea Johnson says
Oh got it. You have to sort of just push it to the side when you’re sewing it.
Brenda says
Oh.. I understand now..that’s possible. Thanks for your time and effort for this tutorial. Now I can’t get terry cloth here. Hope I can get a towel to do it.
Chelsea Johnson says
A towel would work, too! Or you could use minky fabric. Anything that is soft, really.
Michele says
Are the bold black lines the overlap? Thank you for a very cute changing mat. Michele
Chelsea Johnson says
The overlaps are the pieces to the right of the name of the piece. For example, on piece A, the overlap is the piece to the right of the words “A (main piece)”
Michele says
I’m so confused about pattern? Can you explain how I am suppose to line up pieces. Michele
Chelsea Johnson says
Please refer to the picture of the pattern once it has been put together in step one.