Sew your own Changing Pad with built-in diaper and wipes holders. A simple tutorial with lots of pictures, perfect for baby shower gifts!
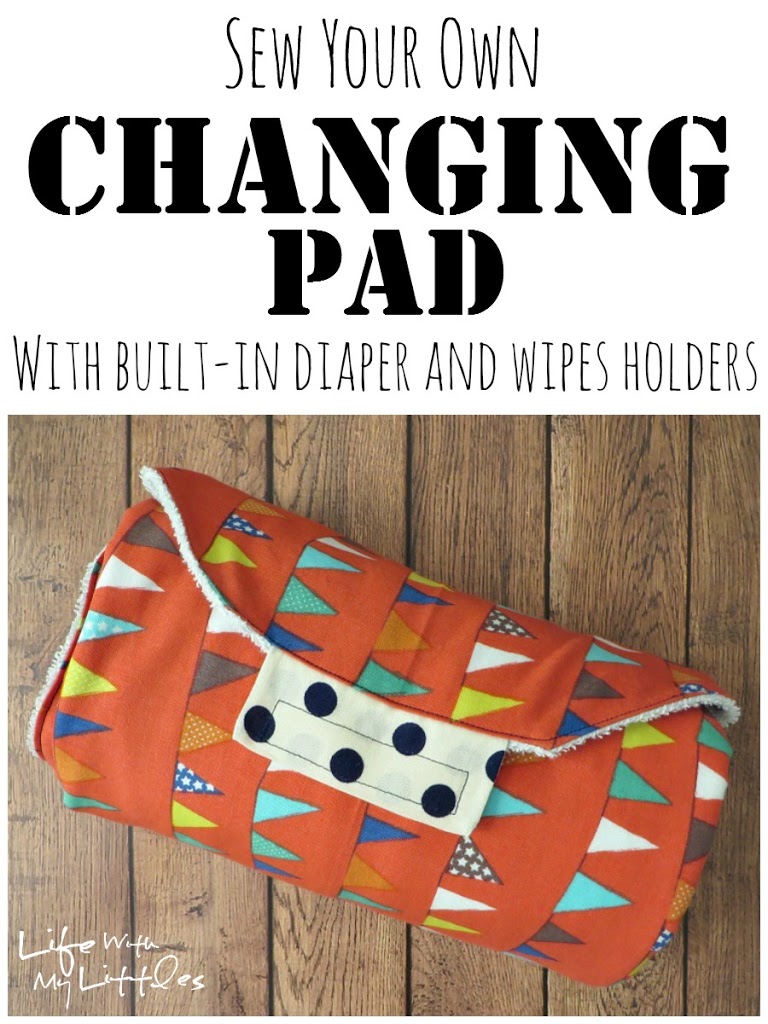
When Little J was born, my wonderful friend Shalie sewed the cutest and handiest changing pad for me. I have been using it for almost two years now, and it still is in great shape and works perfectly! A few months ago, she asked if I wanted the pattern and I immediately said yes! It has places to keep both diapers and wipes inside so you only have to grab one thing when you go change your baby, and it is soft inside so it’s comfy for baby, too. It’s not a hard pattern and I am excited that I get to share it with you today!
Here’s what you will need:
Pattern (download here)
1 1/2 yards cotton fabric (45″)
1 1/2 yards terry cloth fabric
1/4 yard coordinating cotton fabric for closure
3″ 3/4″ wide velcro
6″ 3/4″ wide elastic
Coordinating thread
Thin wipes case (mine is Huggies)
First, print, cut, and assemble your pattern.
When you are cutting it, don’t cut the extra overlaps on the right sides! Those are so you can easily match up your pattern!
Match A to A, B to B, etc. Make sure you are using those overlaps! Here’s what the general shape should look like (except this picture doesn’t use the overlaps).
Second, cut out your fabric! Using the pattern with the edge on the fold, pin and cut it out. You will need to cut the big pattern piece on both the cotton fabric and the terry fabric. And don’t forget to cut your little rectangle for the closure (not pictured).
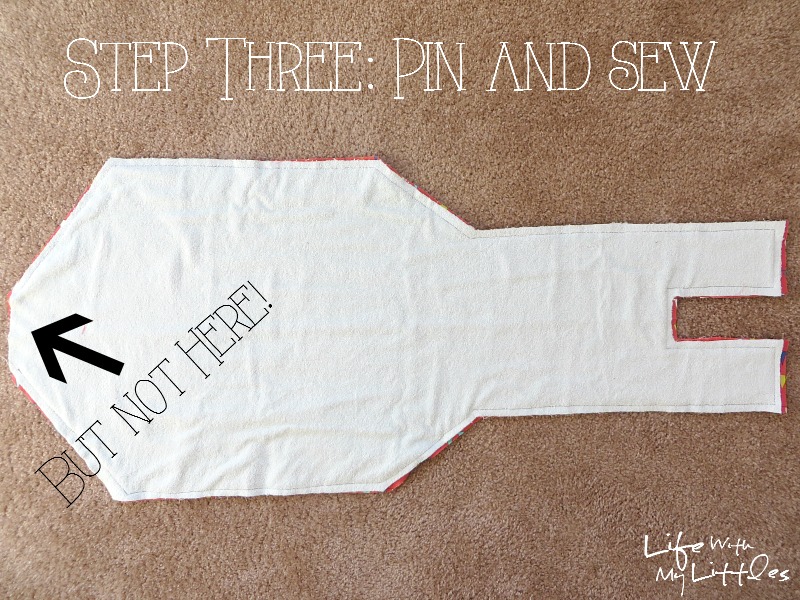
Pin right-sides together and sew all the way around, except for the very top. Sew with a 1/2″ seam for the whole thing, unless otherwise noted.
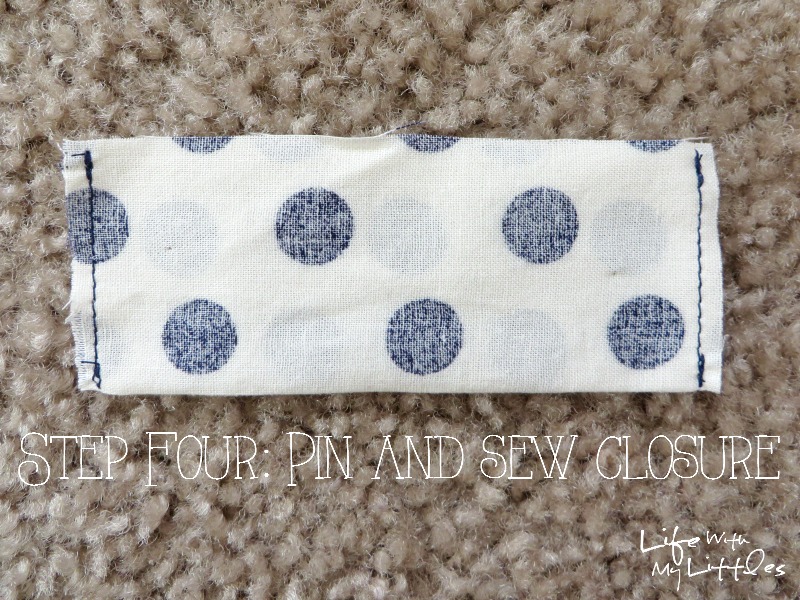
Pin your closure fabric piece, right sides together, and sew the two edges. You want to sew as close to the edges as possible on this one.
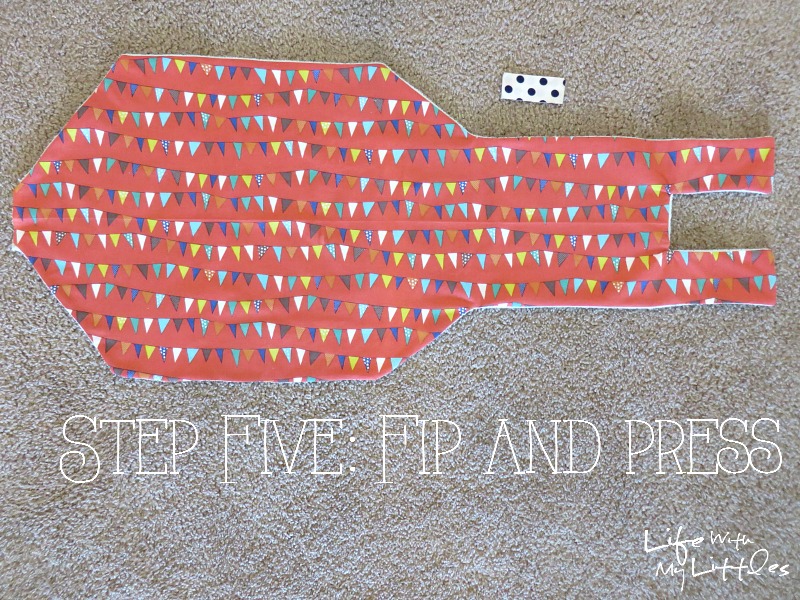
Flip both the changing pad and the closure piece inside out and press.
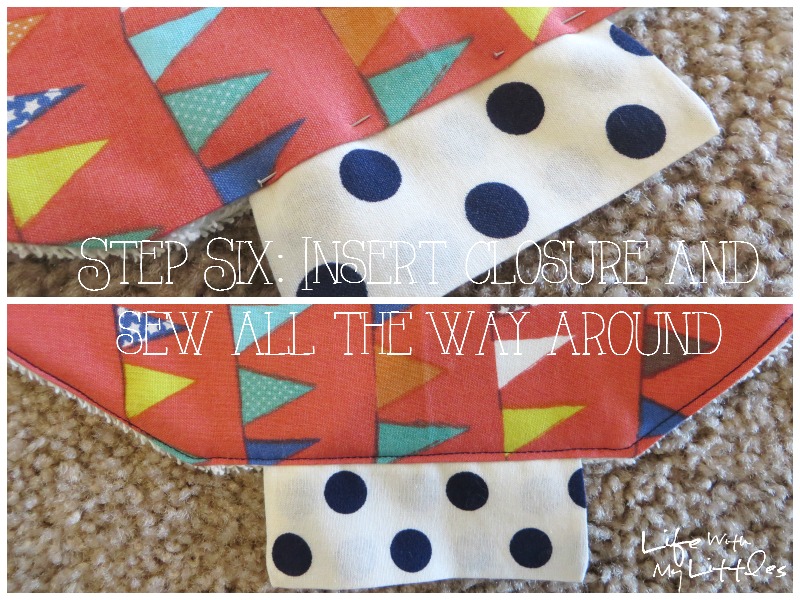
Insert the open end of the closure fabric into the open end of the main piece. Fold down the opening and sew right along the edge. Then continue sewing all the way around the edge (topstitch).
Okay this is where it gets sort of difficult to explain, so make sure you look at the pictures when you are doing this part.
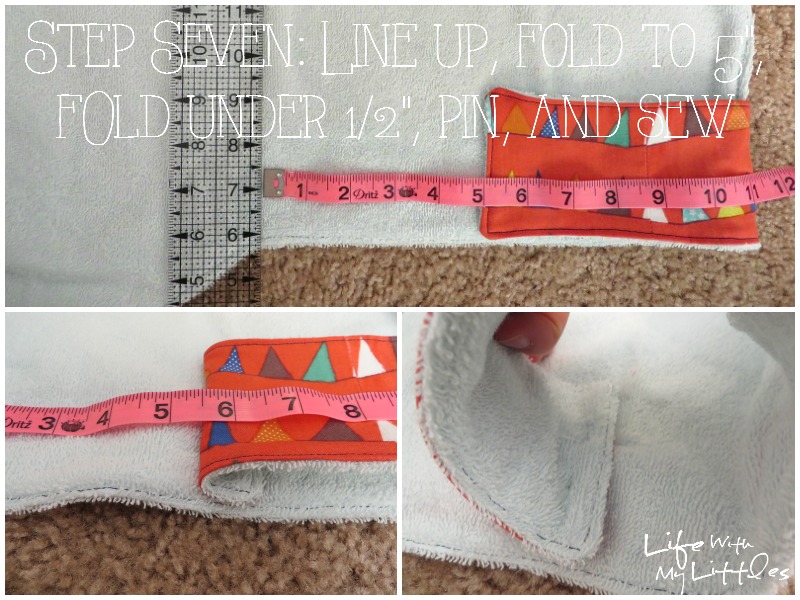
Get a ruler or straight edge, and line it up with the changing pad where it starts to slant back in (see picture). Fold over your flaps so they are 5″ away from the straight edge. Then, fold them under so they are 5 1/2″ away. Pin the folded-under part (see picture). Then sew.
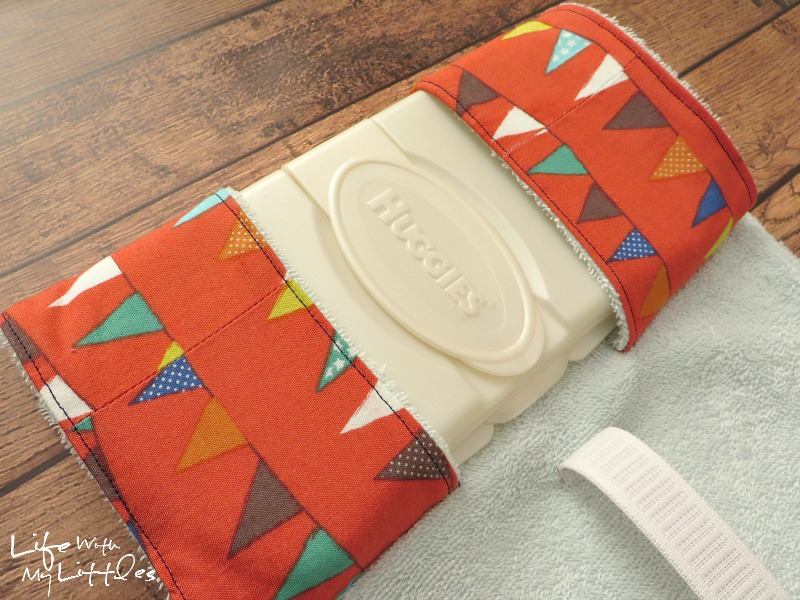
Now you have the part where your wipes case will fit!
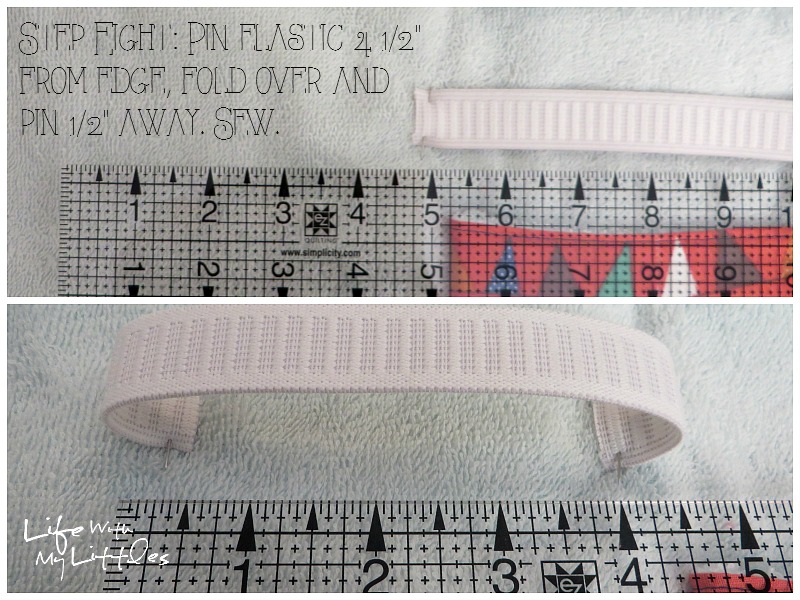
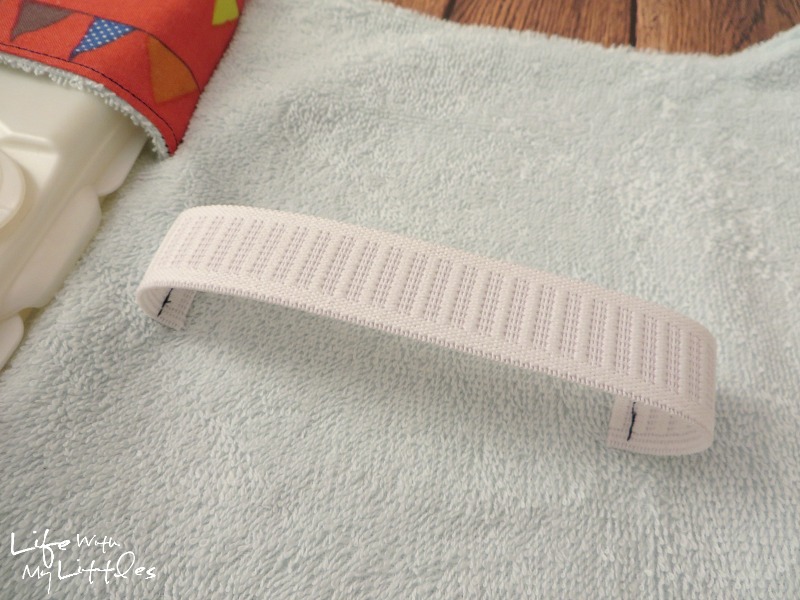
For the elastic, put one edge 4 1/2″ away from the straight edge in the center of the pad. Pin it. Now fold the elastic over itself and pin it so the ends are 3 1/2″ away from each other. Sew the folded-under parts.
Now you have the part for your diapers to slip in!
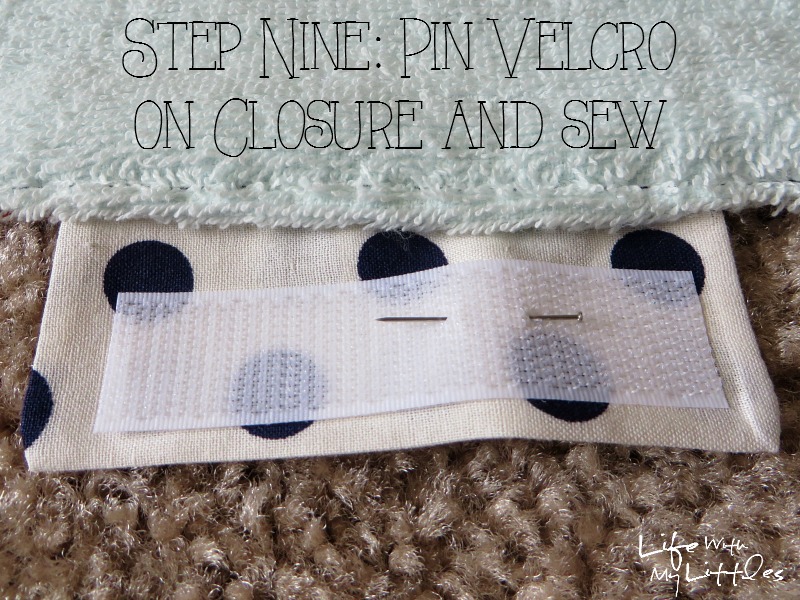
Now it’s velcro time. Sew 3″ of your velcro to the inside of the closure tab.
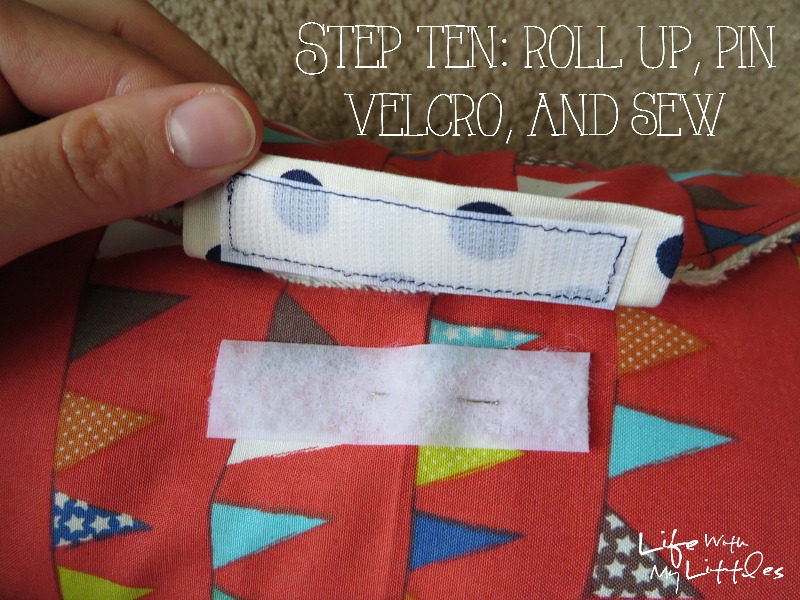
Then, roll your changing pad up with wipes case and diapers inside, and see where the other half of your velcro needs to be. Make sure you have your diapers and wipes case inside! Pin it and sew.
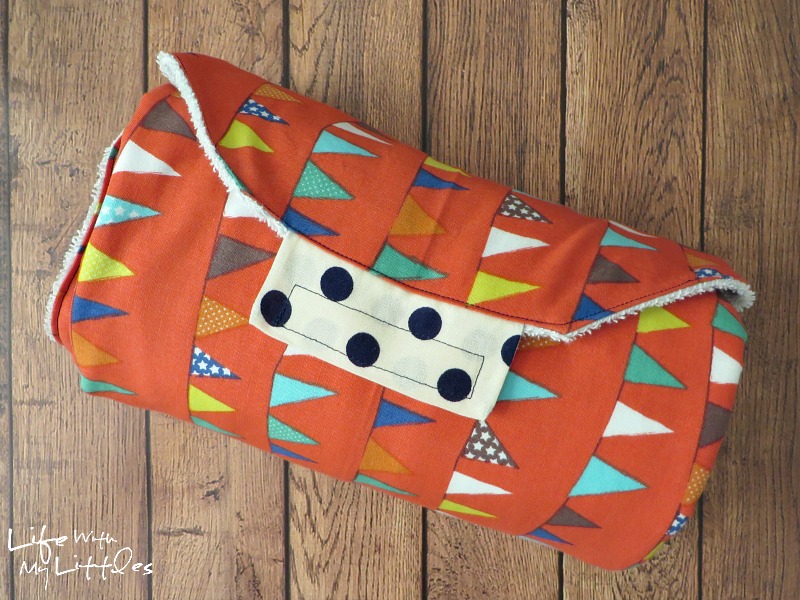
Now you are all done!
I love my changing pad so much! It’s so nice to be able to just grab one thing out of my diaper bag when I have to go change my littles.
This is a great baby shower gift, or even a great sewing project for yourself! It doesn’t take very long to make, and my materials only cost about $12, so it’s way cheaper (and more personal) than store-bought changing pad combos.
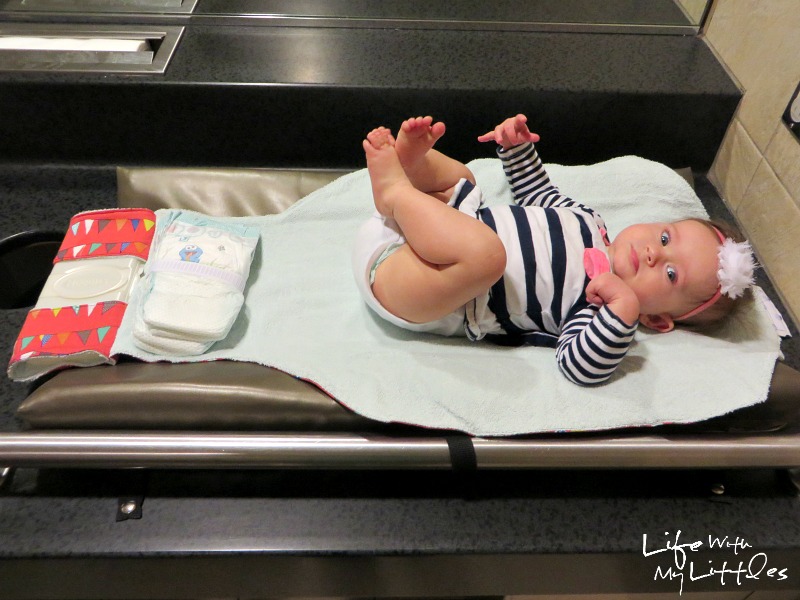
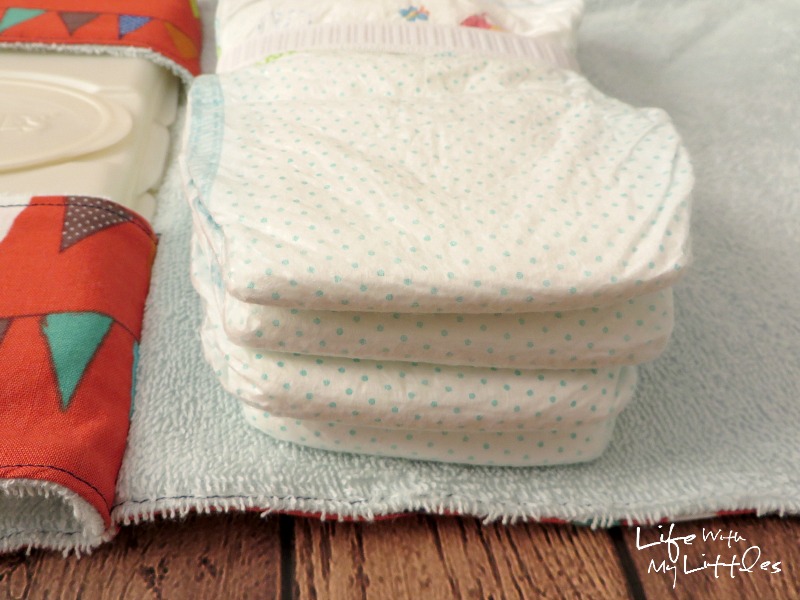
I also love that my changing pad is machine washable! And it can fit at least four diapers without stretching the elastic, so you can carry several backups!
Even Little A loves it!
Are you going to make this for yourself or a friend? Let me know in the comments below!!


Kersten Lindhardt says
I love the way the wipes are accessible without needing to be removed from any kind of pouch- perfect for lazy moms like me 😉 Thank you for sharing this and Little A is so cute!!
Elisabeth says
All of your explanations and pictures made it really clear how to make this handy changing pad. I just started sewing and I’m super happy I was able to make this as a gift for my best friend who will be a mom for the first time very soon.
Loved it, thanks so much!
Chelsea Johnson says
That’s great to hear! Congratulations and I’m glad it worked out so well!
Chelsea says
Thanks, Kersten! It certainly makes it easy to just grab one thing from the diaper bag!
Britt says
This is such a cool concept! I keep a wet bag with diapers, wipes and a change of clothing in my diaper bag so I can just grab that for changes, but I love that this is a changing pad, too 🙂
Chelsea says
It's so nice just having one bag to grab! It makes trying to make a quick change a lot easier!
Jessica says
Ahhh, love this!!! So cute and unique! And it looks so soft too, much better than the store bought ones. Little A is such a dollllll! Love her!
Janae says
Ok that really is amazing! Genius really.
Chelsea says
Thanks! I owe it all to my talented friend Shalie for coming up with the pattern. I love that it's all fabric and can be washed, too! And thanks 🙂 She sure is a sweetie!
Chelsea says
Thanks! I'm glad Shalie let me share it with everyone!!
Anita @ LiveLikeYouAreRich says
LOVE LOVE LOVE this. So practical and cute. I am including it in a round up of homemade baby gift ideas.
Chelsea Johnson says
Thanks so much, Anita!!
Theresa Hayes says
What an excellent idea!!
Chelsea Johnson says
Thanks, Theresa! It has been such a huge help!
Barbara says
Wow. great pattern.My daughter just found out that she will be having identical TWIN girls so I have to get sewing
Chelsea Johnson says
That’s so exciting! Congratulations!!
Andrea says
For myself first but once my mother’s group sees it… at least 9 more needed!
Chelsea Johnson says
Good luck sewing! I get compliments on mine all the time!
Mary says
This is so neat! I’m going to make one for my great niece who just had a baby boy a month ago. Thank you so much for sharing the pattern. The photos really helped.
Chelsea Johnson says
How exciting! And you’re welcome! It always helps to have step-by-step photos when you’re sewing something new!
Pamela Frederick says
Thanks for the handy tutorial. I made one of these for use with our grandson who is due in December. I purchased a “soft pack” of 32 wipes…didn’t see the hard cover ones like in your pics. Anyway. I added KAM snaps to each end of the wipes section of the changing pad so the pack won’t be able to slip out either end. A hard case wipe box may fit more snugly without the chance of falling out. This way, however, if the parents continue to stock with the soft packs, the wipes won’t be able to slip out.
I also made a couple of the burp cloths from a tutorial I saw at the bottom of the tutorial page. The cloths are a nice size and were made in coordinating fabrics to match the diaper changing pad.
Thanks for sharing!
P. Frederick
Chelsea Johnson says
That’s awesome! And a great idea. Thanks for sharing!!!
Natalie Scott says
Making this for a friend this weekend!
Chelsea Johnson says
Good luck!!