The 100 Hour Quiet Book: A detailed look at the 22-page quiet book I made my son for Christmas, complete with references of where to find each page’s pattern!
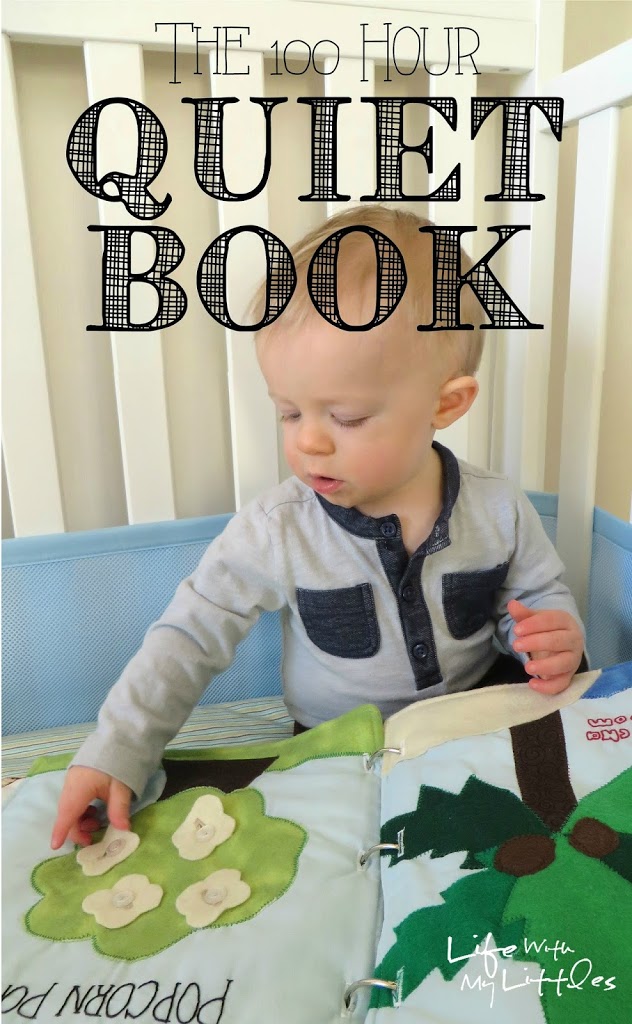
When I first decided I wanted to make Little J a quiet book, I thought it would be a fun, not too hard, fast project.
That is not what this became.
It was still a fun project, but it was hard and it took at least 100 hours to complete.
Of course I could have made this into a project that wasn’t very difficult and didn’t take that much time, but I found like 20 pages I wanted to make, plus I made one of my own, and I am a perfectionist, so I was very detailed in my sewing. And I decided I was going to teach myself how to embroider, so a lot of the pages are hand embroidered.
But let me tell you, IT PAID OFF. This is by far the best, most incredible thing I have ever sewed and I even cried a little when I sewed the very last buttonhole on the very last page.
So, without further ado, let me introduce you to Little J’s Quiet Book.
Let me show you briefly every page inside the quiet book. I found patterns online for all but two of the pages, and one of the pages I made myself I will be making a tutorial for later.
I love all of these pages so much. And I seriously worked super hard on every single one. I added a few things to a few of the wonderful patterns I found, and I took away a few things from those wonderful patterns as well.
For the outside cover, I took a bunch of leftover strips of fabric from things I have already made for Little J (burp rags and bibs, his crib bedding set, his car seat cover, his shopping cart cover, yeah, I’ve made a lot). I just sewed it into two big squares for my front and back outside covers.
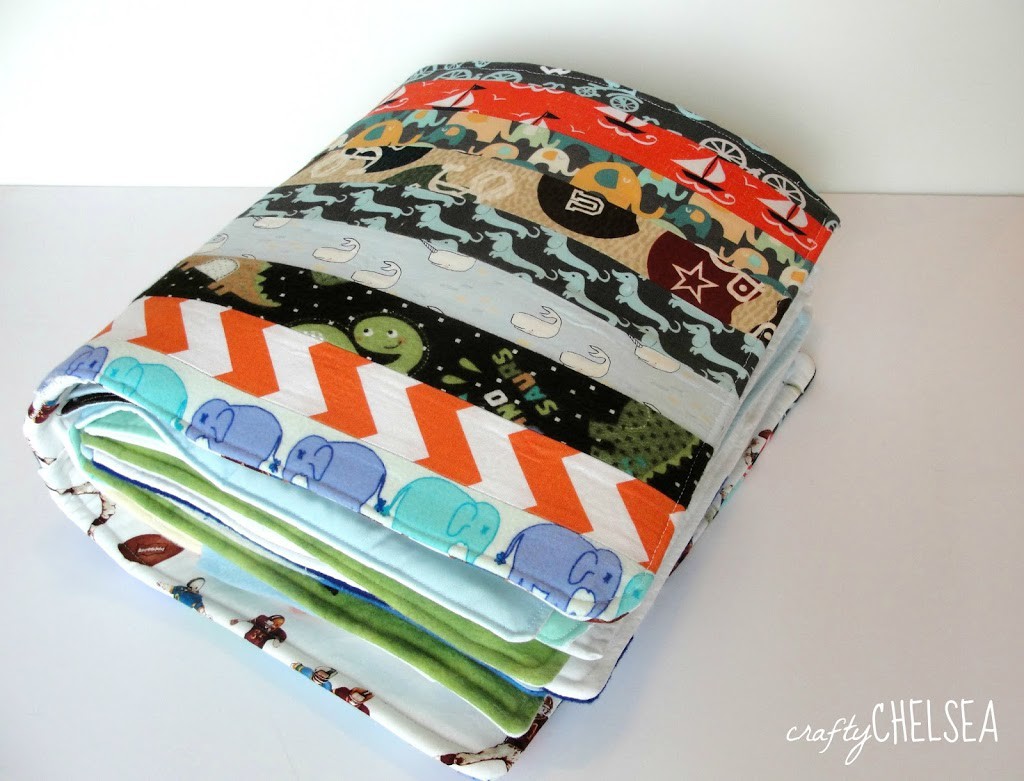
For the inside cover, I took some cute football fabric one of my friends gave me and sewed a pocket on. So there is a nice big pocket in front and in back to hold little things that don’t have a place (right now one pocket holds my Chicka Chicka Boom Boom letters.

The way I bound my book was with buttonholes and binder rings. On the inside spine, I sewed six buttonholes so that I could insert three large binder rings. On each page of the quiet book there are three buttonholes, one for each binder ring. I liked this idea as opposed to sewing it all together or using ribbon because a) this way I can wash pages individually, b) my son loves untieing things, and c) I can easily add or remove pages whenever I want. Here is a helpful tutorial I used from Serving Pink Lemonade to help me figure some of the binding out. I obviously didn’t follow it exactly but it helped me a lot.
Okay. Now for the quiet book pages!!
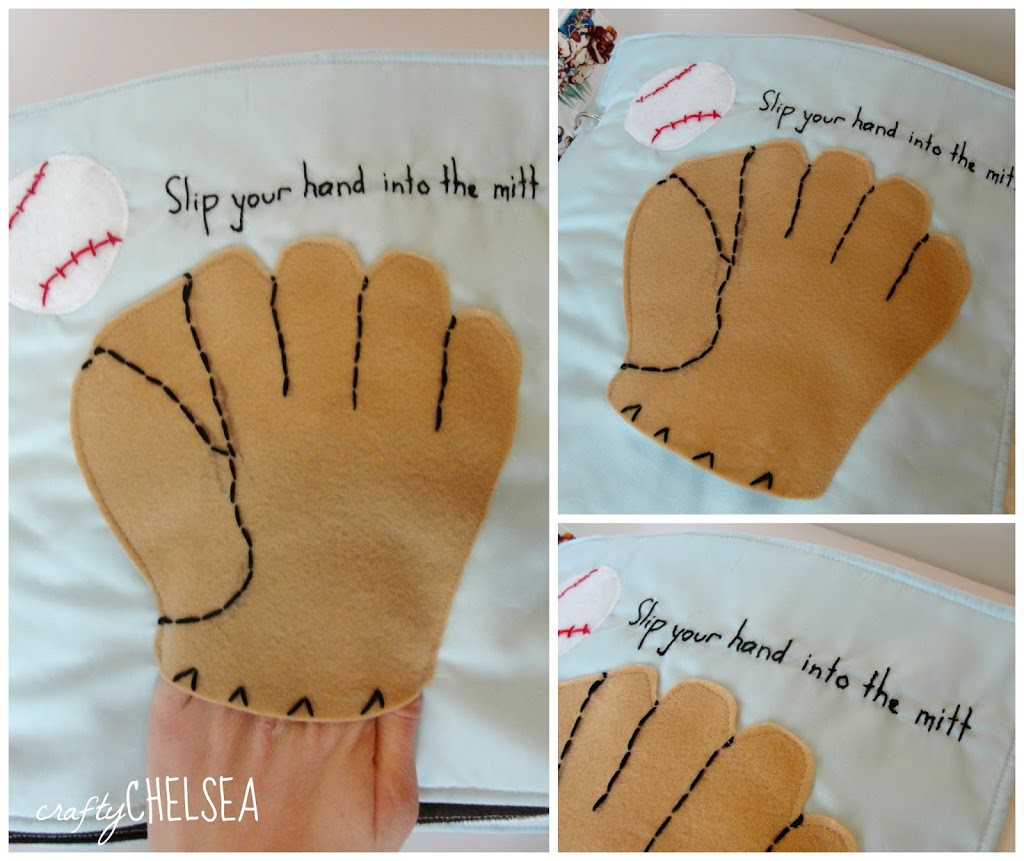
This baseball page is a cute one because as you can sort of see in the picture, your child can slip their little hand into the mitt! My hand is the one in the picture so it’s clearly too big for me, but perfect size for a child with non-giant hands. The pattern is from How to Make a Quiet Book.
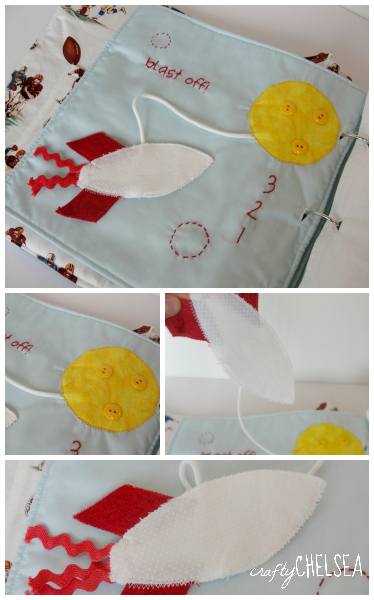
I love this little rocketship page. It has a rocketship that is attached to a string so that your child can fly the ship around the moon without losing it! I hand-embroidered the words and circles, and then sewed some buttons onto the moon. The pattern is from Homemade by Jill.
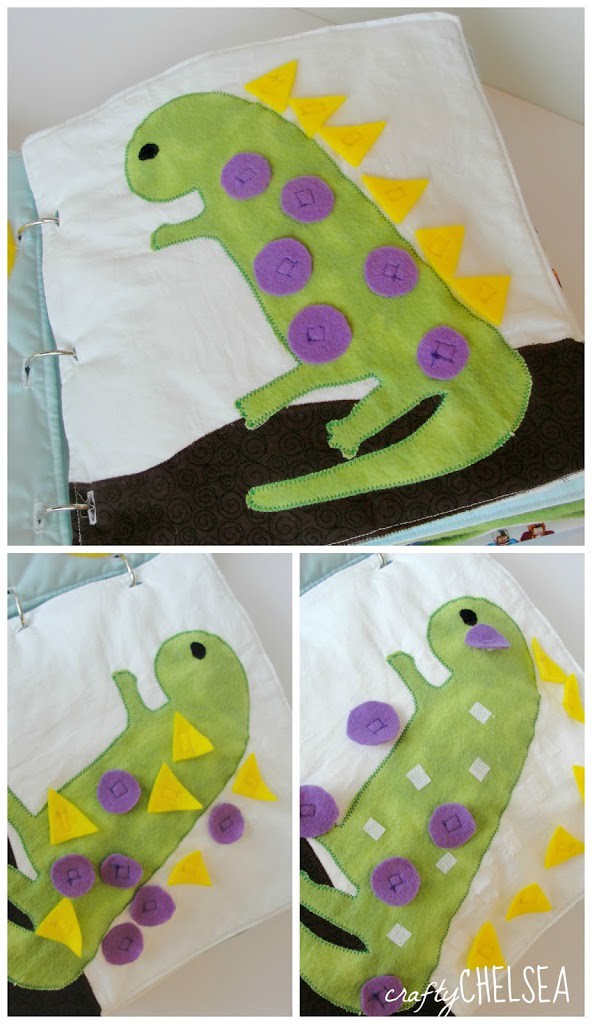
This cute little dinosaur is a good way to help your kids be creative. You can pull off his spots and spikes and mix them up. My son already loves pulling them off the velcro, even though he doesn’t understand he has to put them back on. One day! The pattern is from The Quiet Book Blog.
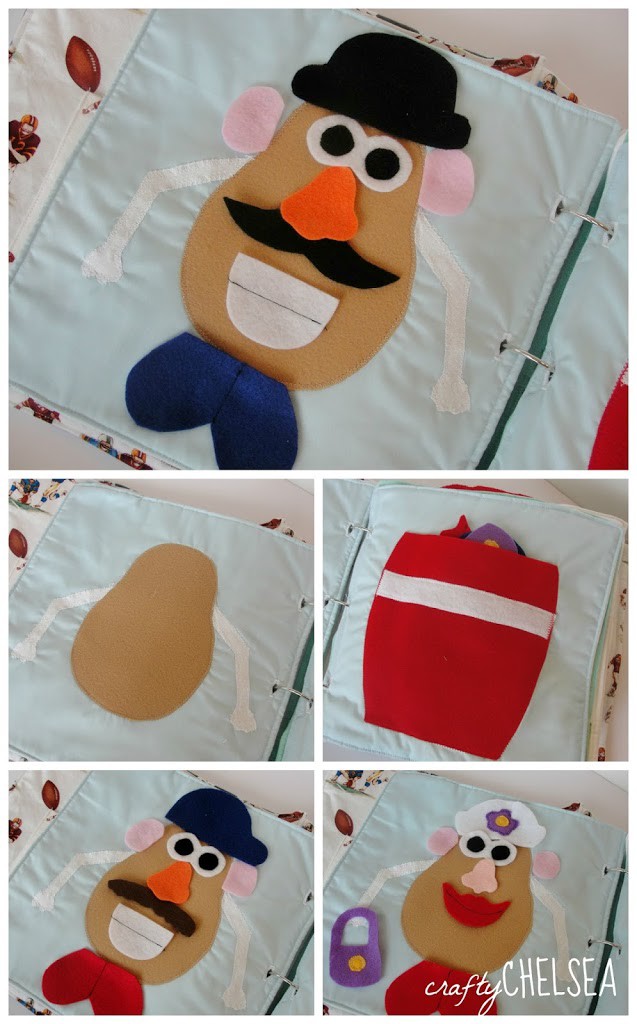
This Mr. and Mrs. Potato Head page is super cute and looks just like the real thing! I like it because the combinations are pretty much endless as to what your Potato Head can look like. Your child (or you) can get super creative with this one! The pattern is from The Quiet Book Blog.
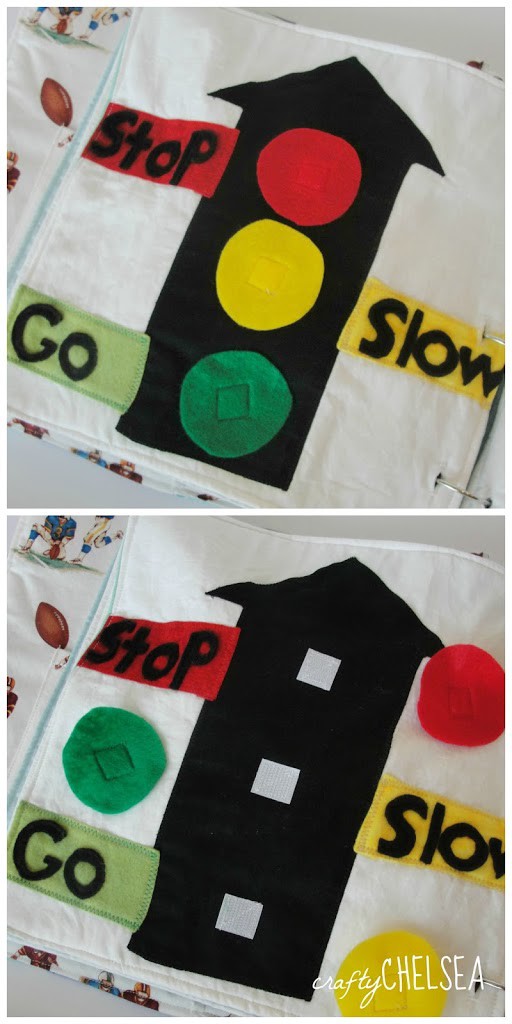
This is a really great page for matching colors. Each light velcros onto the part of the stoplight where it goes, and then there is a word for each on top of a colored background. The pattern is from Oopsey Daisey.
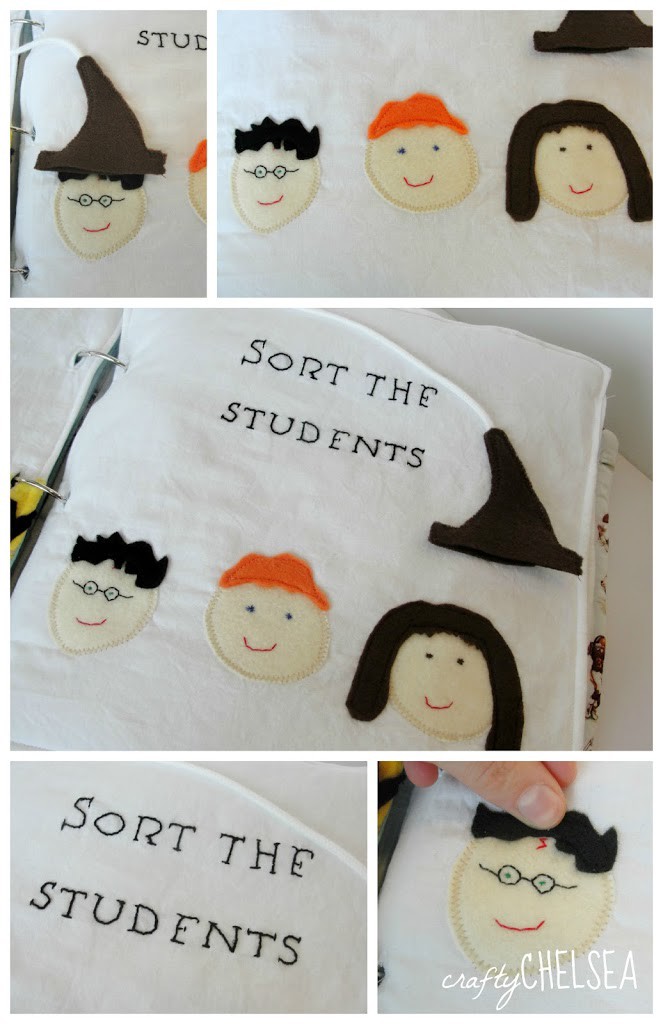
Okay, so there is no denying that I am a nerd when you see that I have TWO Harry Potter pages in my son’s quiet book. I got this Sorting Hat page idea from a picture I saw on Pinterest. I didn’t find any tutorial, but it was pretty easy. If you are a super nerd like me, you may even notice that the font I used for embroidering is called “Lumos” and is the font of the chapter headings in the books. No shame. The Sorting Hat is attached to a string that is long enough that it can be set on Harry, Ron, or Hermione’s heads. Like I said, no pattern, but super simple.
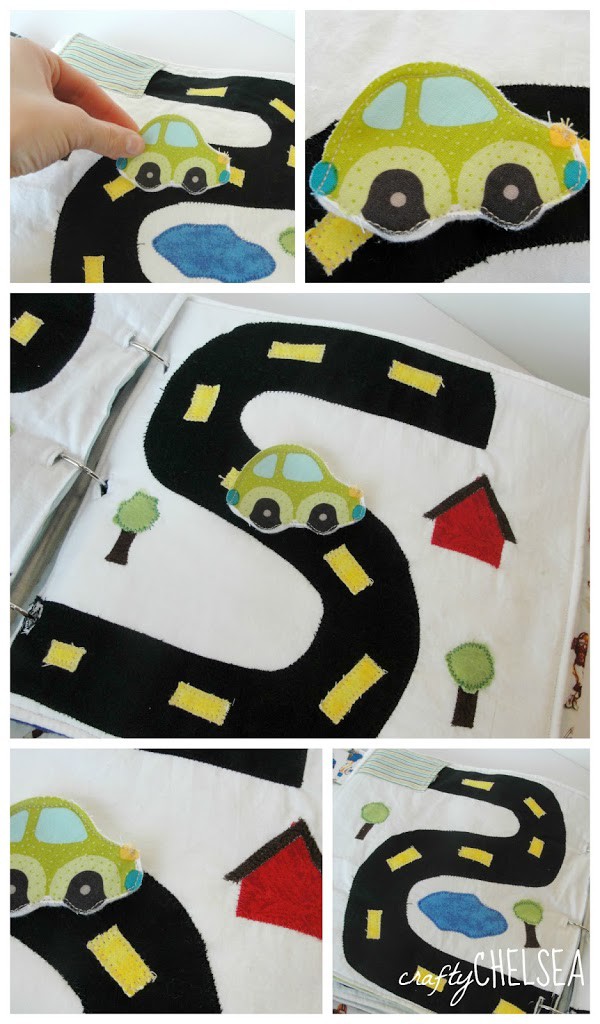
I love my little car pages! It took forever to sew all of those little yellow dashes onto the road, but it turned out so cute. There is a little pocket for the car (like a garage), and the car can be taken out and played with. For the car, I just cut out a picture of a car from some other fabric I had and sewed it onto some felt. Simple! The pattern is from The Quiet Book Blog.
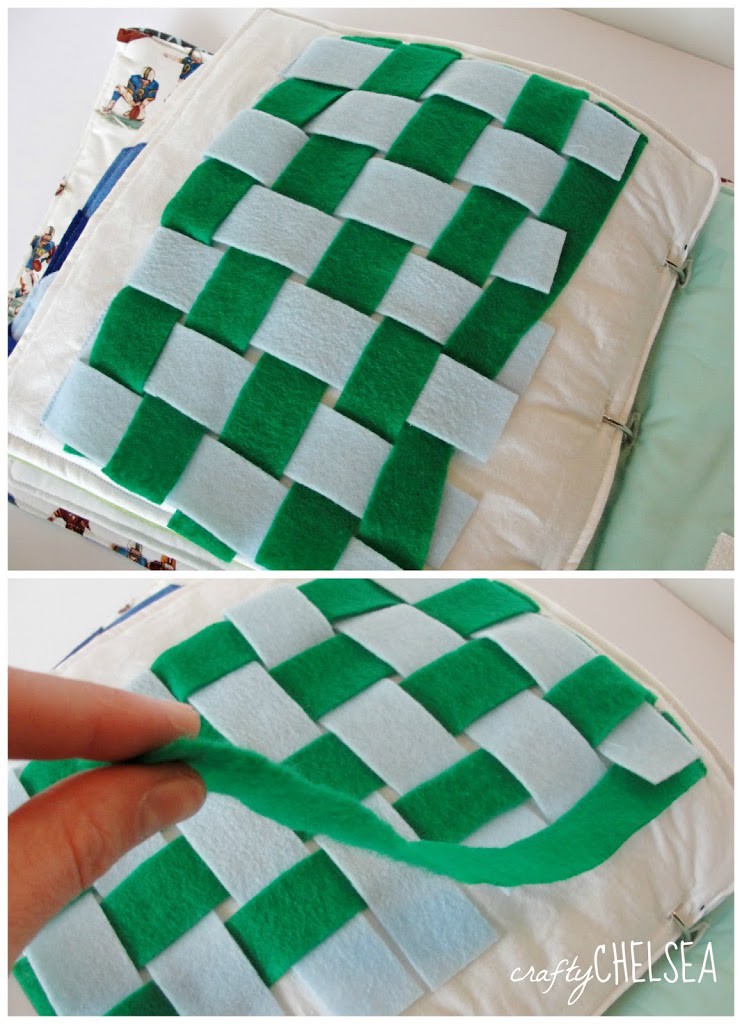
This page is definitely too complicated for Little J right now (and for a while), but it will be super good for his fine motor skills once he is able to do that. I just sewed down one edge of each strip of felt and then weaved them all together. Definitely the easiest page to make. The pattern is from The Quiet Book Blog.
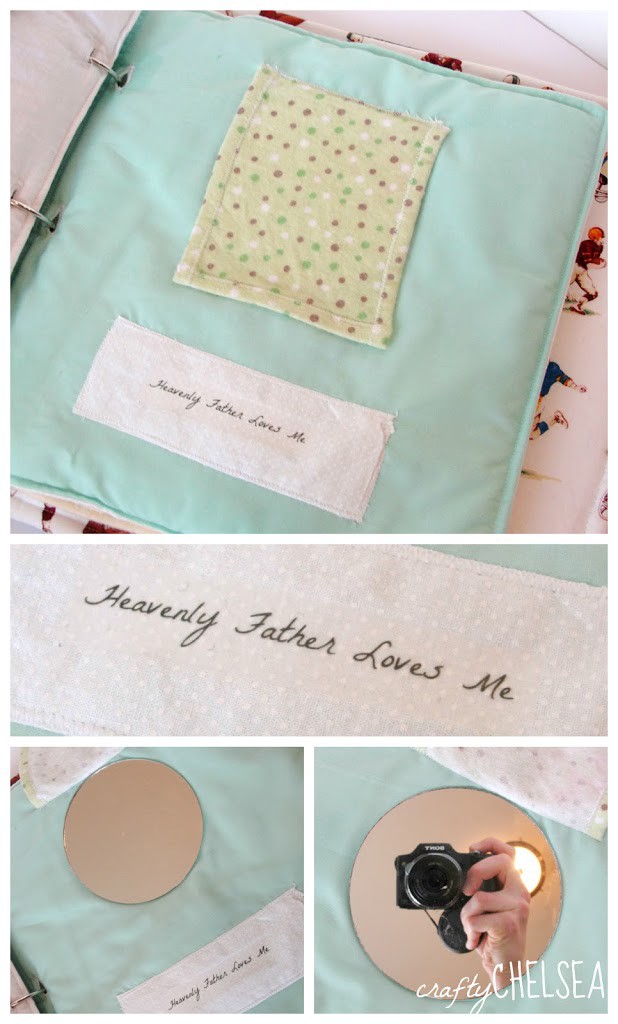
My son loves looking in the mirror, so I thought this would be a really cute page to include. I glued a small round mirror down on the page, and then sewed a little square cover over it. Then I sewed down a little white rectangle with the words “Heavenly Father Loves Me” ironed-on. It turned out so cute! There wasn’t really a pattern, but I got the idea from Little Miss Stitcher.
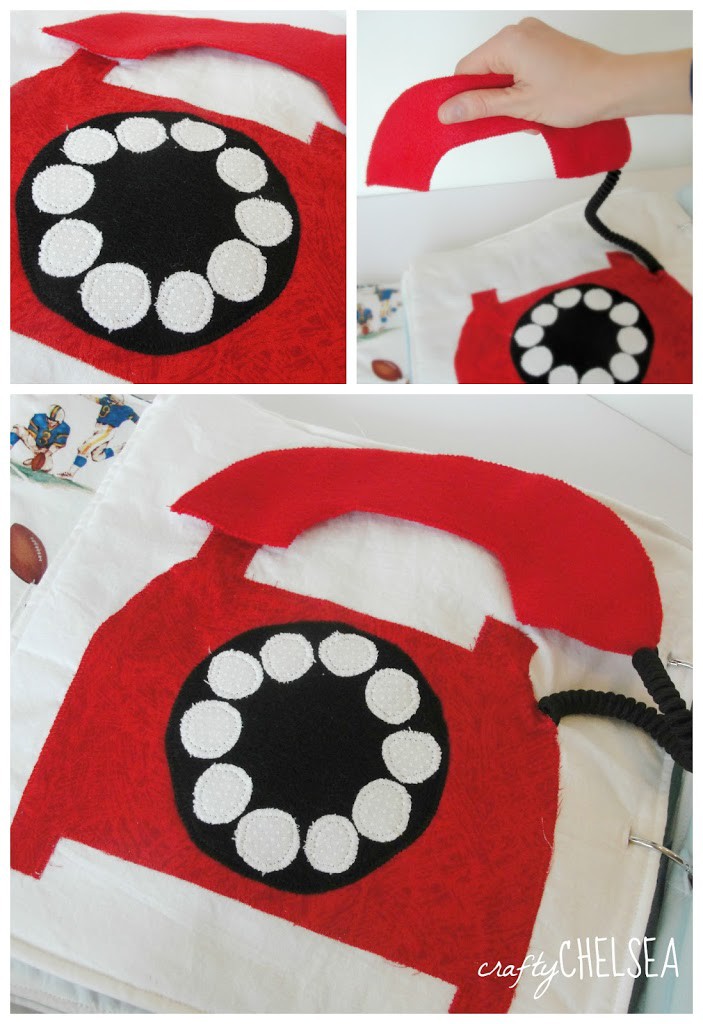
This page is cute because my son can actually pick up the phone and pretend to talk into it (not right now, but one day). The phone is attached to the base by a curly shoe string so it actually looks like a cord! I was going to add numbers to the dial, but I think it looks cuter without. The pattern is from Oopsey Daisey.
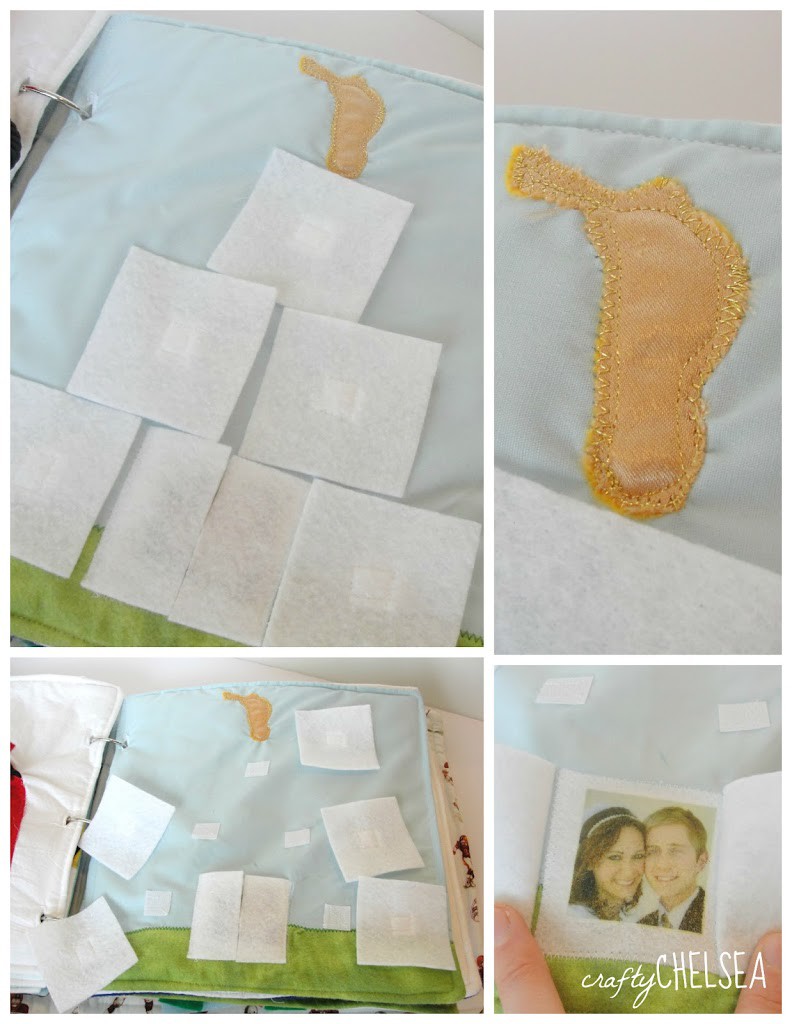
I especially love the pages in my book that reference our beliefs and faith, and this page is one of those. There are five little white squares that velcro onto the page and build a temple. Inside the doors of the temple is a picture of the Mister and I on our wedding day! Then there is of course a gold Angel Moroni atop the temple. How cute is that? The pattern is from Camille’s Casa.
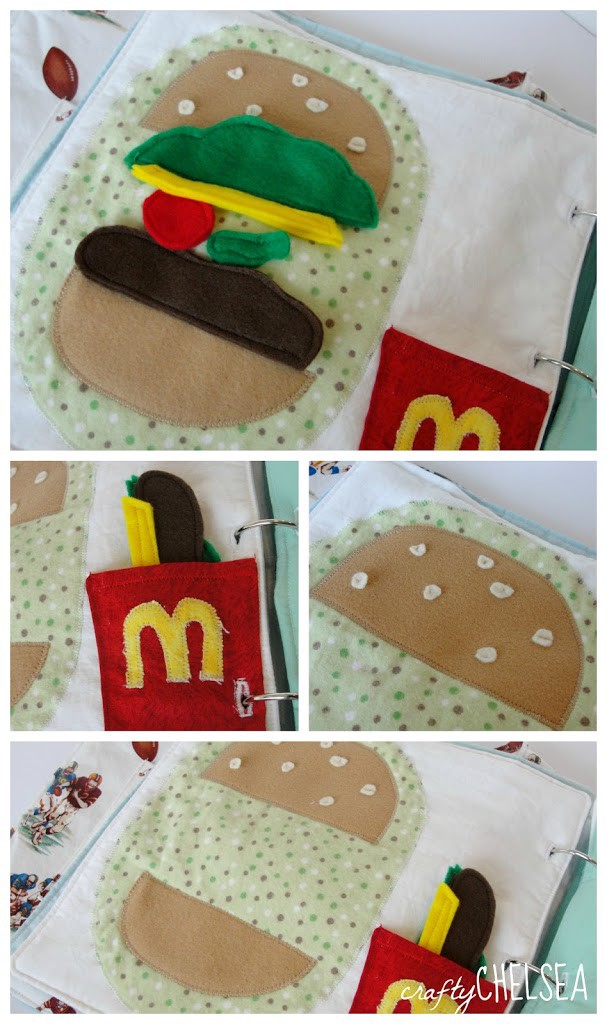
Okay even though I am a vegetarian, I love the way this page turned out. There is a bun on a plate that is sewn to the actual page, and then the little “M” pocket (like McDonald’s) holds the inside of the burger. There is a slice of cheese, a patty, lettuce, a tomato, and a pickle. The original pattern didn’t say to sew little sesame seeds on the bun, but I think it really helped make the top bun look more bun-like. The pattern is from Oopsey Daisey.
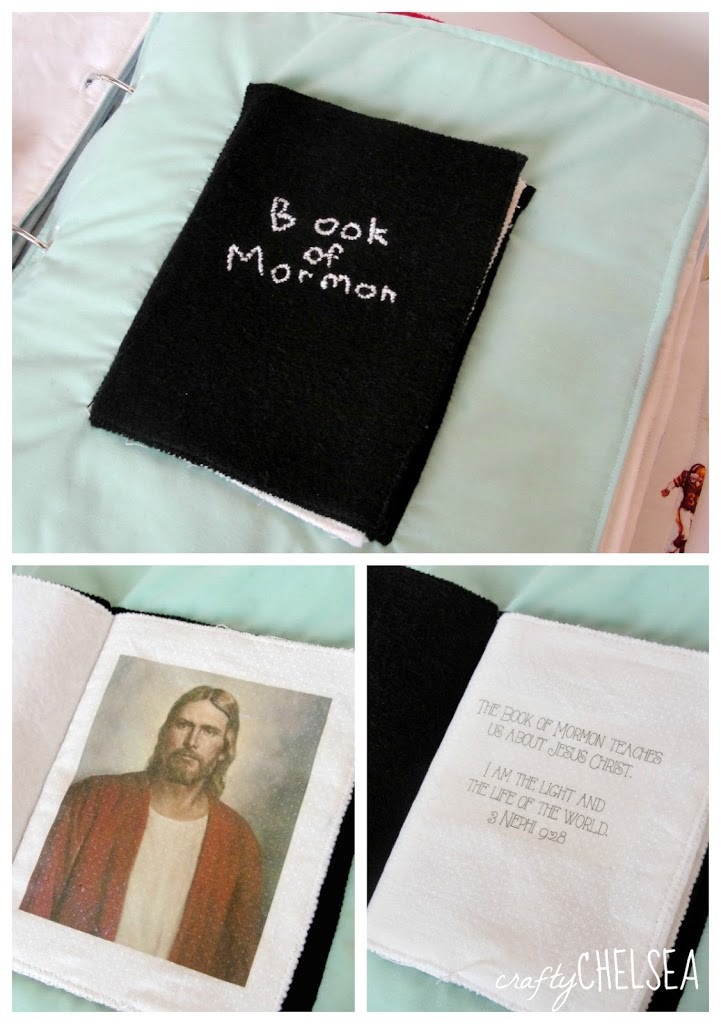
I also absolutely love this page. It has a front cover and two pages that open, and then the back cover is sewn down. The front cover has the first embroidery I tried to do (don’t judge) and it just says “Book of Mormon” on it. Then the first page has an iron-on transfer of a picture of Jesus Christ, and the second page says “The Book of Mormon teaches us about Jesus Christ” and then has 3 Nephi 9:28. I used an iron-on for that too, because there was no way I was going to try and embroider that whole thing. There wasn’t a pattern, but I got the idea from Little Miss Stitcher.
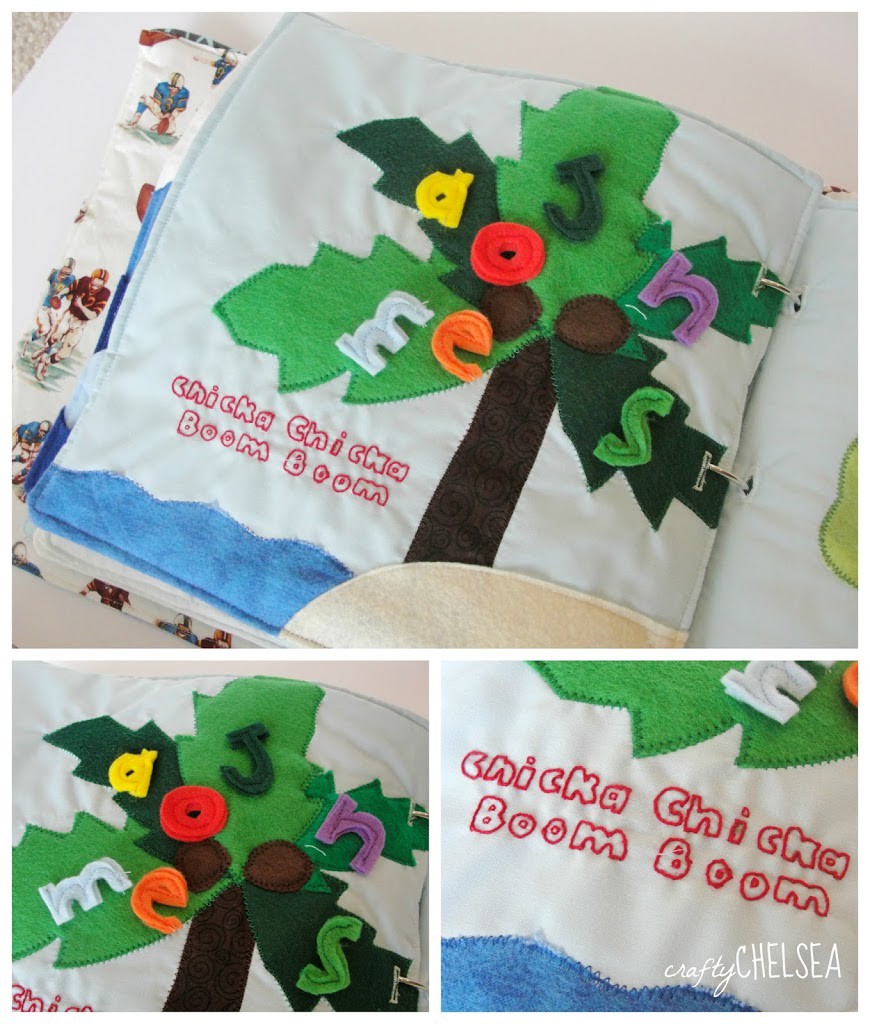
One of the first books I ever bought for my son was Chicka Chicka Boom Boom, because it was one of my favorite books growing up. So when I saw this pattern, I knew I had to make it for Little J! It has a palm tree on a beach with some waves, and then I added the “Chicka Chicka Boom Boom” embroidery. The original actually had the letters done differently, but I wanted to do them like this. Also, the letters I did spell out my son’s name (which I won’t tell you but you might be able to guess). That way, he can learn the letters in his name! The pattern is from Oopsey Daisey.
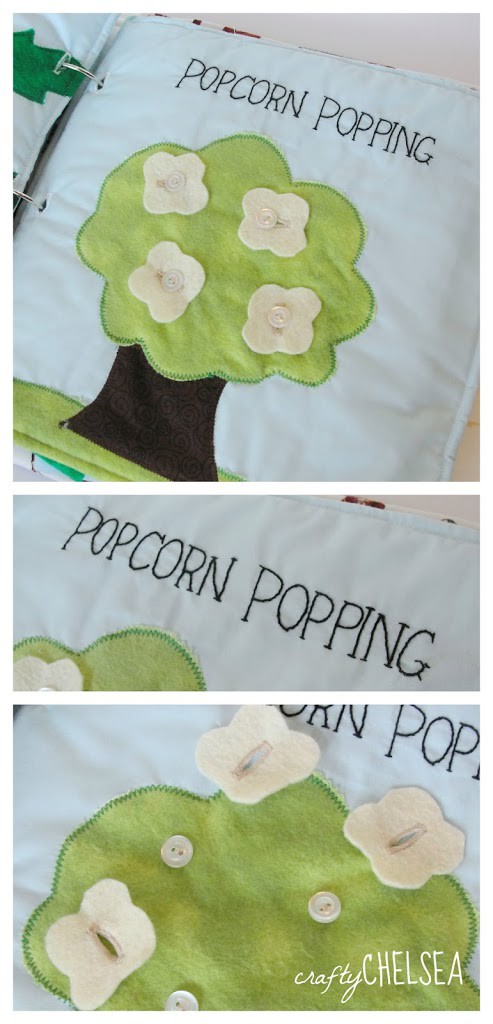
If you ever went to primary (or know someone who did) you might be familiar with the “Popcorn Popping” song. The first line goes like this: “I looked out the window and what did I see? Popcorn popping on the apricot tree!” I sing that song to my son a lot, so I knew I had to make this page. I embroidered the words, and then each little piece of popcorn has a buttonhole and attaches to the tree with a button. The pattern is from Little Miss Stitcher.
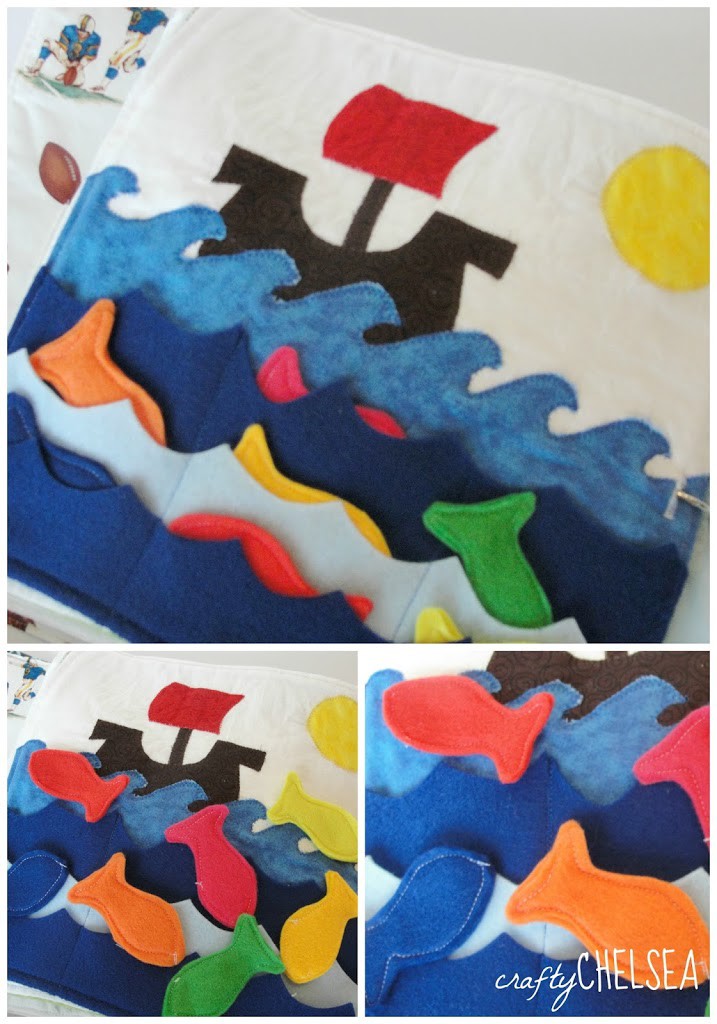
The pattern for this page actually was supposed to include a fishing pole with a magnet so you could catch the fish, but I decided I didn’t want to do that. So my page just has four waves with pockets for my seven fish, and a cute little boat and sail. Each fish is a different color, and they are fun to take out and make them swim around the waves! The pattern is from Pops and Podge.
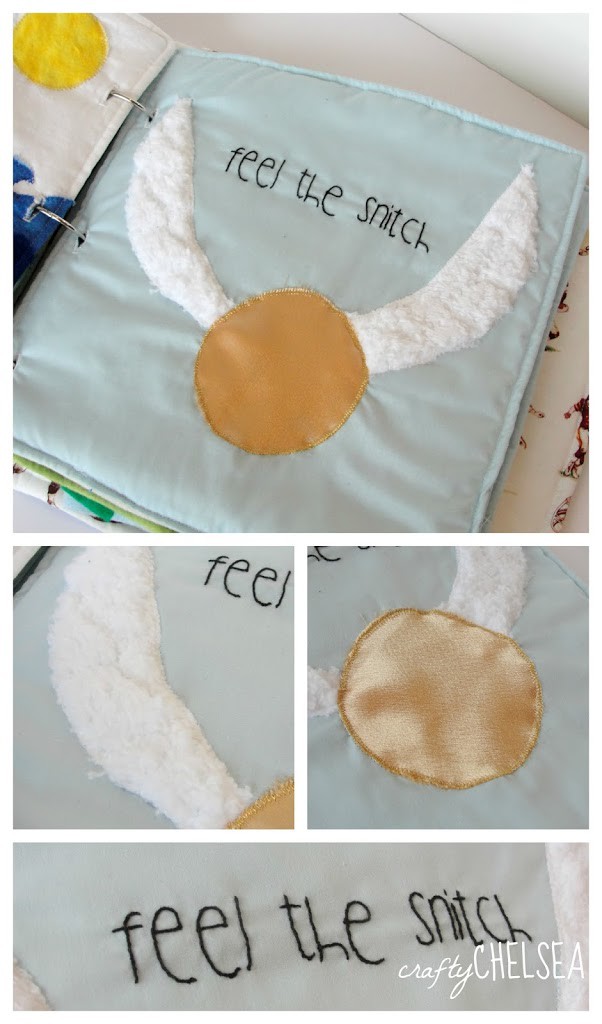
This is EASILY one of my favorite pages, it it was all by me! No pattern, no inspiration on Pinterest, all me. It has a shiny, gold circle for the body of the Snitch and two fluffy pieces of fabric for the wings. Then I embroidered “feel the Snitch” and all done! It’s great for my son right now because of the different textures. And it’s great forever because it’s a Harry Potter page! You can find a more detailed tutorial on my blog here. Because for real, everyone needs to have this page.
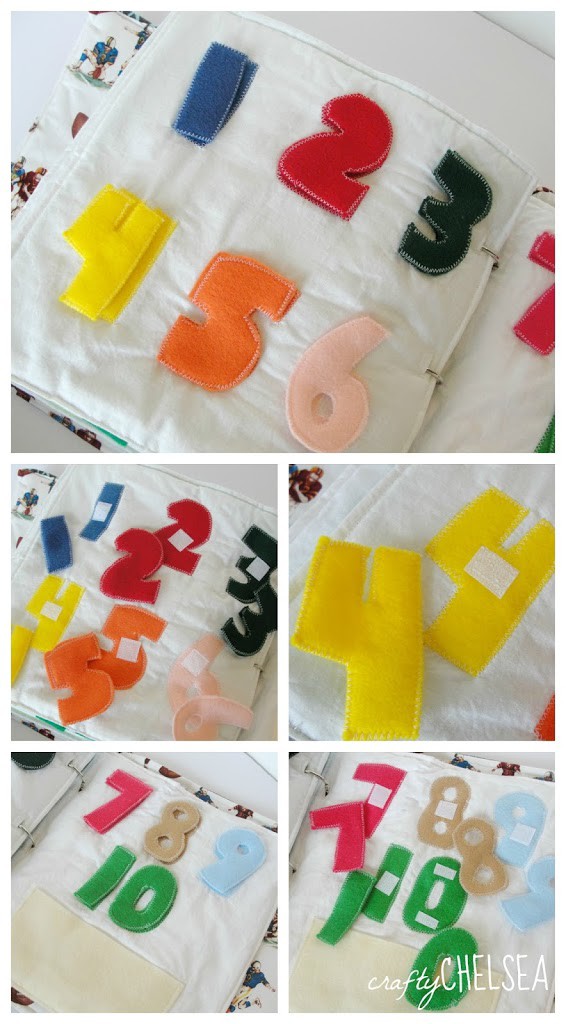
These pages are great because not only can my son match the numbers, but each number is a different color so he can match colors until he learns numbers. There is also a little pocket sewn on that I can put all the numbers in if I wanted (I think that will be more helpful when he can actually match them). Right now he just loves to pull them off and chew on them! The pattern is from How to Make a Quiet Book.
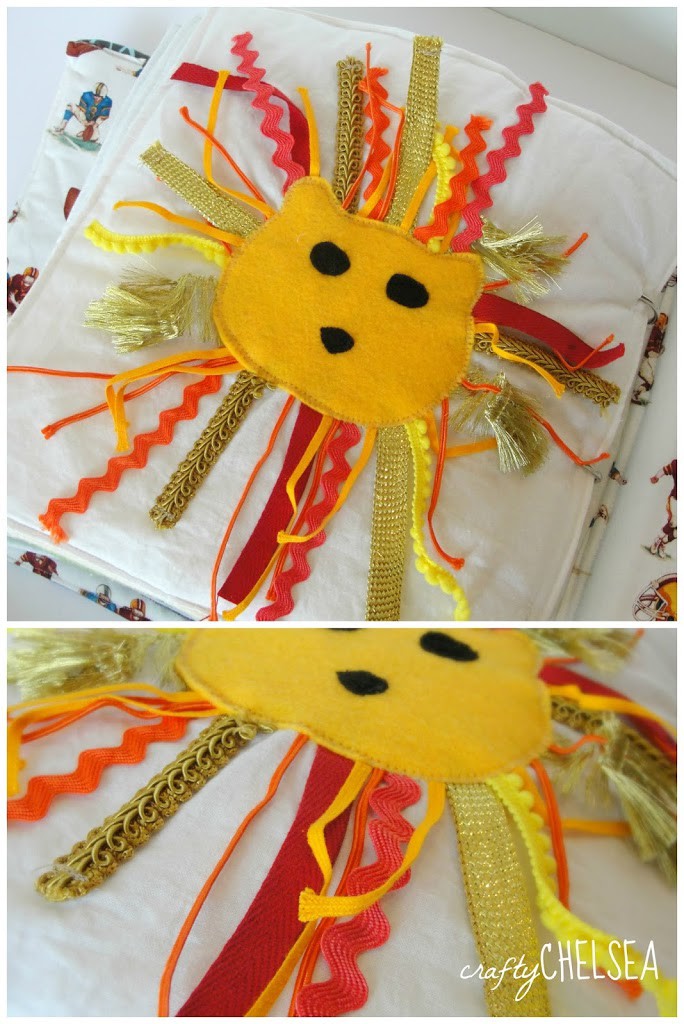
The last page in Little J’s quiet book is a lion with a crazy, wild mane. I love this one because it is all about feeling and textures. I bought a bunch of different red, gold, yellow, and orange ribbons and turned them into my little lion’s mane. Little J already likes to play with the ribbons! It’s perfect for him! The pattern is from The Quiet Book Blog.
So there you have it! My massive, 100 hour, perfect, incredible quiet book that I made for my son for Christmas. I love that there are so many different pages and none of them are the same. He will learn so many skills and be able to play with it for many years since there are some easier pages and some more complicated ones. I am sure I will make another quiet book for him (a smaller, more themed-one is currently in my mind), but it will be a while because I need a break! For now, I am 100% happy to watch him sit with this big book and play and learn.
Thanks for checking out Little J’s Quiet Book! I hope you have found a page or two or three to inspire you to make your own!!
Sofia says
Your book is so awesome, I want to make one for my daughter too. I have one question about the cover page. How do you attach to the pages? Can you add a picture about the front? I see from outside I cannot see the binder rings. How did you make it?
Chelsea Johnson says
Thanks! Here’s the link to the tutorial I used http://www.serving-pink-lemonade.com/2011/01/quiet-book-cover.html
Jay says
LOVE! Thank you for sharing your talent and ideas with us!! 🙂
Chelsea Johnson says
Thanks, Jay!
Charlotte says
I love this and wamt to make one for my grandson for Christmas. Your book is perfect!
Chelsea Johnson says
Thank you so much, Charlotte! Good luck!
Brenda says
I was wondering about the mirror. Are the edges sharp? Also, did you worry about it breaking? I love your book and I’m inspired to make one for my grandson. Thank you!
Chelsea Johnson says
Thanks! And no, the edges are not sharp. And I’ve never worried about it breaking. It’s in the middle of the book so it’s basically surrounded by a pillow 🙂
Amy Wallace says
I came across this on Pinterest today, so I had to investigate. You did such great and detailed work here, bravo! I’ve been thinking about doing a quiet book for my new granddaughter coming next month. But, now you’ve got me thinking of doing another one for my grandson starting Kindergarten in the fall as well. Thanks for all your great ideas!
Chelsea Johnson says
Thank you! And yes, that would be so fun for him! Good luck! You’re welcome!
Lynn says
Wow! You did a Great job!!!
Thank you for sharing your ideas and inspiration for each page! I wish I had the talent you have shown here!
God Bless !!
Lynn
Chelsea Johnson says
Thanks, Lynn!